
A Step By Step Plan For The Perfect Shelf
This week, I’ve had a shelfie clear out. This sounds more painful than it was. Whilst procrastinating my way around my house during what should have been working hours, I discovered that my vintage glass collection was sitting in a layer of solid dust. Before Kim and Aggie stampede over to judge, I am putting the majority of the blame on to the fireplace being removed last month which, despite appearing to be but a small hole in the wall, managed to cover the entire house in mini floaty particles of brick and centuries old soot. I’ve been here before. Joe has always been obsessed with anything techy and sixteen years ago, he bought a 60 inch LCD screen. This was before the days of decent TV’s (before the flat screen, even - THAT’S how old we are) but he wasn’t deterred - he wanted to create a cinema style, wall mounted, surround sound movie experience in our open plan kitchen/dining/living space, perfect for a 1930’s semi in the heart of Reading. No easy task.

A very old photo of our Caversham kitchen. Joe put those shelves up. They fell down. I had to employ a handyman to come and put them up properly.
My Dad was roped in to assist, being, as he was, a DIY expert of Handy Andy level (in contrast, Joe has always been of the stand aside and watch level). He arrived from Pinner with his angle grinder and the two of them proceeded to demolish the very dodgy plastering by chasing in for the cables. However, they omitted to cover up any of the furniture or, indeed, anything in the room and my Mum and I returned from The Oracle after a shopping trip to find the entire ground floor bathed in a sea of red brick dust. There’s nothing worse than picking an apple from the fruit bowl only to discover it’s covered in soggy grit.
Historically, I have always put up my own shelves. The reason for this is because unfortunately, I am not blessed with a DIY husband. Joe has many strengths (including but not limited to sleeping, watching Homicide Hunters and the expert ability to pick out a Net A Porter entry on the bank statement within seconds of viewing), but erections of the shelf variety are not his forte. More Frank Spencer than Nick Knowles when it comes to skill with a drill, we’ve had several near divorce experiences whilst jointly embarking on home improvements. When Ella was a baby, I decorated her bedroom in F&B Calamine, a lovely pale pink that was perfect for a little girl. I took time and effort to make sure all was just right, choosing the perfect accessories and fabrics to make the room her own. The ONLY thing that Joe had to do was to put up a metre long wooden shelf on brackets above her bed. Naively, I left him to it. Ever since I’ve known him, Joe has had a complete inability to read instructions when it comes to DIY tasks. By this, I mean he discards them, flatly refusing to acknowledge their existence. Up went the shelf, down went the kudos of my room. His insistence that he didn’t need a spirit level meant that the shelf was visibly slanted and as the Barbie camper van simply slid off, it became obvious that it was not fit for purpose. Even when we came to sell the house, it’s comedy hanging was pointed out by the buyers. From this point on, I have either taken on such tasks myself or alternatively, hover over him like a demon as he does it, an act which exacerbates his frustration at the DIY duty in hand.
Anyway, the dusty glass situation made me realise that it had been some time since I’d had a proper shelf reshuffle. My dining room is currently under siege by Ella, who despite the fact that she has a perfectly good bedroom complete with study desk, has commandeered the table for her A Level studies. You can barely see the surface for floral files, stacks of flash cards, Stabilo neon highlighters, Percy Pigs and countless discarded glasses of squash. As a result, I’ve been ignoring this room and the shelves have taken the hit. This week, I decided enough was enough and I cleared both the decks and the dust, restyling and reinventing the space until it made me happy. So what did I do? Here’s my Step By Step Plan for making your shelves stand out in a crowd. And not a cloud of dust.

1.Empty The Shelves
Take it ALL off. Every bit of it. Cull the coloured sand sculpture that you bought in the Isle Of Wight; discard the dusty vase that your mother in law bought you seven years ago and that you’ve never liked; toss out the Toby jug that you’ve stopped even noticing anymore. Be ruthless. Sometimes we get so used to things being on our shelves that we don’t even stop to think whether or not we actually even care for them. Everything in your home should make you feel happy.
Look at your shelf accoutrements and work out which still float your boat. You might find that they ALL do. Or you might find that none of them do. Or perhaps you still like a few but the rest should have been history a decade ago. Donate what you don’t love and shop your home for extra pieces that you think might work well together. You’re ready to start. Oh, and don’t forget to dust your shelves first - they’ll have at least an inch from lack of love. Hmm, hold on, maybe that’s just mine.

2. Stick To The Rule Of Three
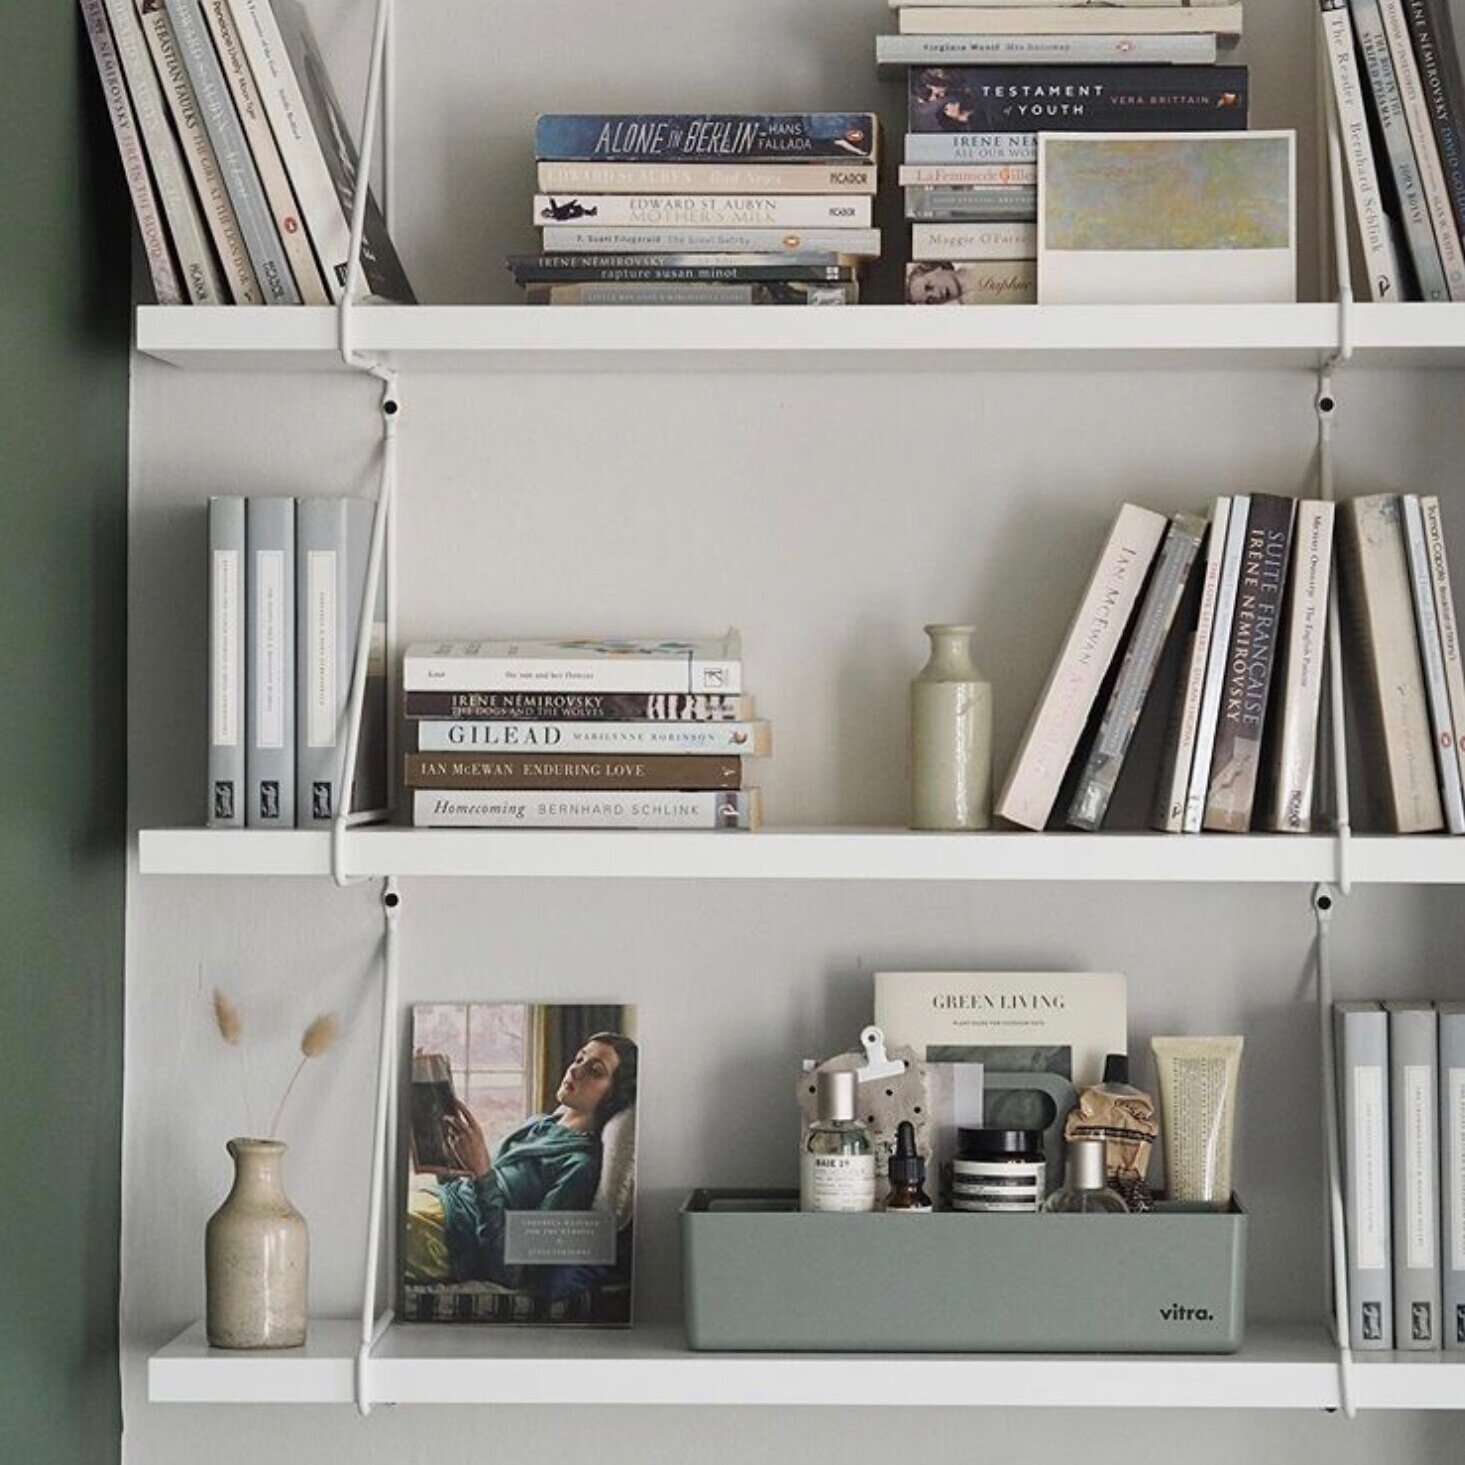
Things are better when they are grouped in threes - FACT. This isn’t just me saying this, btw. It’s a scientific fact that when we see items placed in odd numbers, our eyes fix to the grouping and our gaze is encouraged to look around the room. We group in threes because it’s the smallest number that can form a distinguishable pattern in our heads. This applies to everything we do, whether it be art, books, accessories, even furniture.
It doesn’t matter WHAT you group - if you want to create an impact, make it an odd number. So that includes three, five, seven - okay, I know, you can do the math. It took me two attempts to get a C at O’Level, I’m used to dealing on a lower level. Check out this post from Katty Patterson - the perfect example of the rule of three. Raised plant, tick. Interesting skateboard, tick. Pile of records at lower level, tick. WINNING.

3. Stack It Up
Use books as both a prop and a point of interest. I’m a big fan of the coffee table book, both for their beauty and for their flexibility in adding interest to a space and they’re perfect for styling up. Stack them sideways, vertically, any which way you like. Stacked upwards they’re perfect as a base for accessories, adding height to smaller objects. Colour coding works brilliantly - curate books in similar colours to create a focal point that’s as attractive to look at as it is space filling.
Scour the charity shops for vintage books in lovely tones - you’ll be donating and saving from landfill at the same time. I recently bought a stack of vintage orange Penguin Books from Sue Ryder charity sale that I’ve used to great effect in The Barn conversion. Books and magazines can be beautiful - stack them outwards to show the cover. Picture ledges (super cheap and available from IKEA) are perfect for this purpose too.

4. Add The Art
Back to the eyes, the eyes, look into my eyes, you’re under. Sorry, distracted. When things are on varying level it creates a variety of focal points and your sight will be drawn to different areas. Art is a great way to up the levels - propping behind a selection of accessories, or even a smaller piece behind a bigger piece, adds depth and interest to your display. Juxtapose the pieces that you use - scour the charity shops for small vintage prints and mix them up with modern typography.
Dig out old family photographs to make your scheme personal and frame them up. And if you have a record collection (mine goes all the way back to Mirror Mirror by Dollar), have a look to see if any are suitable for display. I inherited some of my Dad’s LP’s which are far cooler than my own (think Beatles, Rolling Stones and Supertramp rather than my own Pepsi & Shirley and Howard Jones) and I have these displayed all over the house.
5. Curate A Collection
Blending items of a similar tone can be really impactful. I’m an avid collector of vintage glass which can be picked up for a song in charity shops - I’ve curated it in colour tones and it really makes it pop. One piece of green glass alone looks a little boring; add it to four other pieces of green glass and it becomes a collection. The same applies to accessories. Years ago, I had an obsession with white china and collected all sorts of pieces, big and small, bringing them together on one shelf to create an impact.
I’ve collected shells and stones whenever we go on holiday for many years and I display those on the shelves in glass cloches. Stick to a colour scheme for impact, as blogger Cate St Hill has done here in calming tones. Grouping items of a similar colour, no matter what the texture, is super effective.

6. Mix Textures & Vary Height
If there is one thing that I would write on my interiors orientated gravestone, it would be the words texturing and layering. This is the MOST important part of creating a room and space that works for you. Unless you want a home that looks like a pine warehouse, that is (been there, done that, spent twenty years getting rid of it all). Mixed woods, glass, concrete, metals, stone, fabrics - the contrast of these textures are what bring your rooms to life and adds the layers.
The same applies to your shelves - mixing materials is what gives your room visual interest and keeps the eye on the go. You’re looking for impact, a pleasing array of items that make your heart sing. Vary the heights of the items you place - some taller, some smaller, some mid level. You can see examples of this on every photograph in this blog post - one level is an immediate red buzzer in the Britains Got Talent of shelf styling.

7. Bring In The Plants
Finally, no shelf arrangement would be complete without greenery. In fact, no home would be complete without greenery - bringing the outside in is so important when we are planning our spaces. There’s several reasons for this but mostly it’s adding that natural texture and colour that we are so drawn to. The rising popularity of biophillic design - the concept of connecting us and our homes and workspaces to the natural environment outside through the inclusion of nature within our spaces - means that most of us now have plenty of ‘plant babies’ to look after, not an easy job if, like me, you find it hard enough looking after your actual children.
It’s a true fact that plants entering my home have no idea whatsoever that they have a 30% survival rate at best. Anyway, plants are GOOD and there’s no denying that any shelf arrangement would be lacking without at least a couple of the green beauties to perk it up. Click here for my blog on houseplants that are hard to kill and go for trailing, easy to care for varieties such as Spiderwort (also known as Wandering Jew) and Golden Pothos (also known as Devils Ivy) which from experience, can survive all types of abuse.
So that’s my Step By Step Plan for styling up your shelves and making them pop. It’s really easy to neglect these spaces and sometimes we just need a push to clear the decks. This week, I removed a balloon dog that I had bought from The Range back in 2016 (Instagram gold, old timers) that had no relevance to my room decor whatsoever but that I was so used to looking at, it had almost ceased to exist. Refreshing the shelves, switching it up a notch can really lift both your space and your mood. And don’t forget - if you don’t love it, ditch it. Both you and your home will be in a much happier place! And if my husband ever offers to assist you in your shelf erection? Just say NO.