
How I Created An Outdoor Kitchen In My Garden
My Dad was the King of BBQers. When we were small, we would holiday on French campsites near La Rochelle with our family friends and he’d cook amongst the pine trees. When we moved to Hong Kong, he installed his Weber on the balcony and was not deterred by the fact that we were 22 floors up in the sky - he even BBQ’d the Christmas turkey, a traditional that has continued in our family over the last 40 years. When we moved back to the UK, he upgraded to a gas model and for many years, whenever we visited, he would be outside whacking the steaks on the grill, whatever the weather, with a glass of wine in his hand. My Mums only role was to ensure that the table was laid and the salad was tossed and ready to go for when he triumphantly brought in the perfectly cooked beef fillet to a round of applause. Good times.
When I met Joe, he had never BBQ’d in his life. Not only that, he had never actually cooked a meal and had lived for many years since he left home on a diet that consisted purely of pasta based microwave dinners. We moved into our first home, a new build on the old Elm Park football ground in Reading in 2000 and one of our first purchases was a BBQ. The house was a Barrett Home and perfect for our needs, but unfortunately we had unwittingly made several poor choices when deciding to buy. The first was that we were on the end of a terrace and completely overlooked to the side by another housing development which not only was able to view us in the garden at all times but which also blocked out the sun for at least 99% of the day. The second was that we hadn’t taken into consideration the fact that at the end of our very tiny garden was the Spread Eagle public house, previously the go to hostelry for pre match drinks when Reading were playing at home and still a popular venue for TV game watching. As a result, our attempts at weekend garden BBQing were often thwarted by eagle eyed side watchers and yelling football fans. Sigh. You live and you learn.
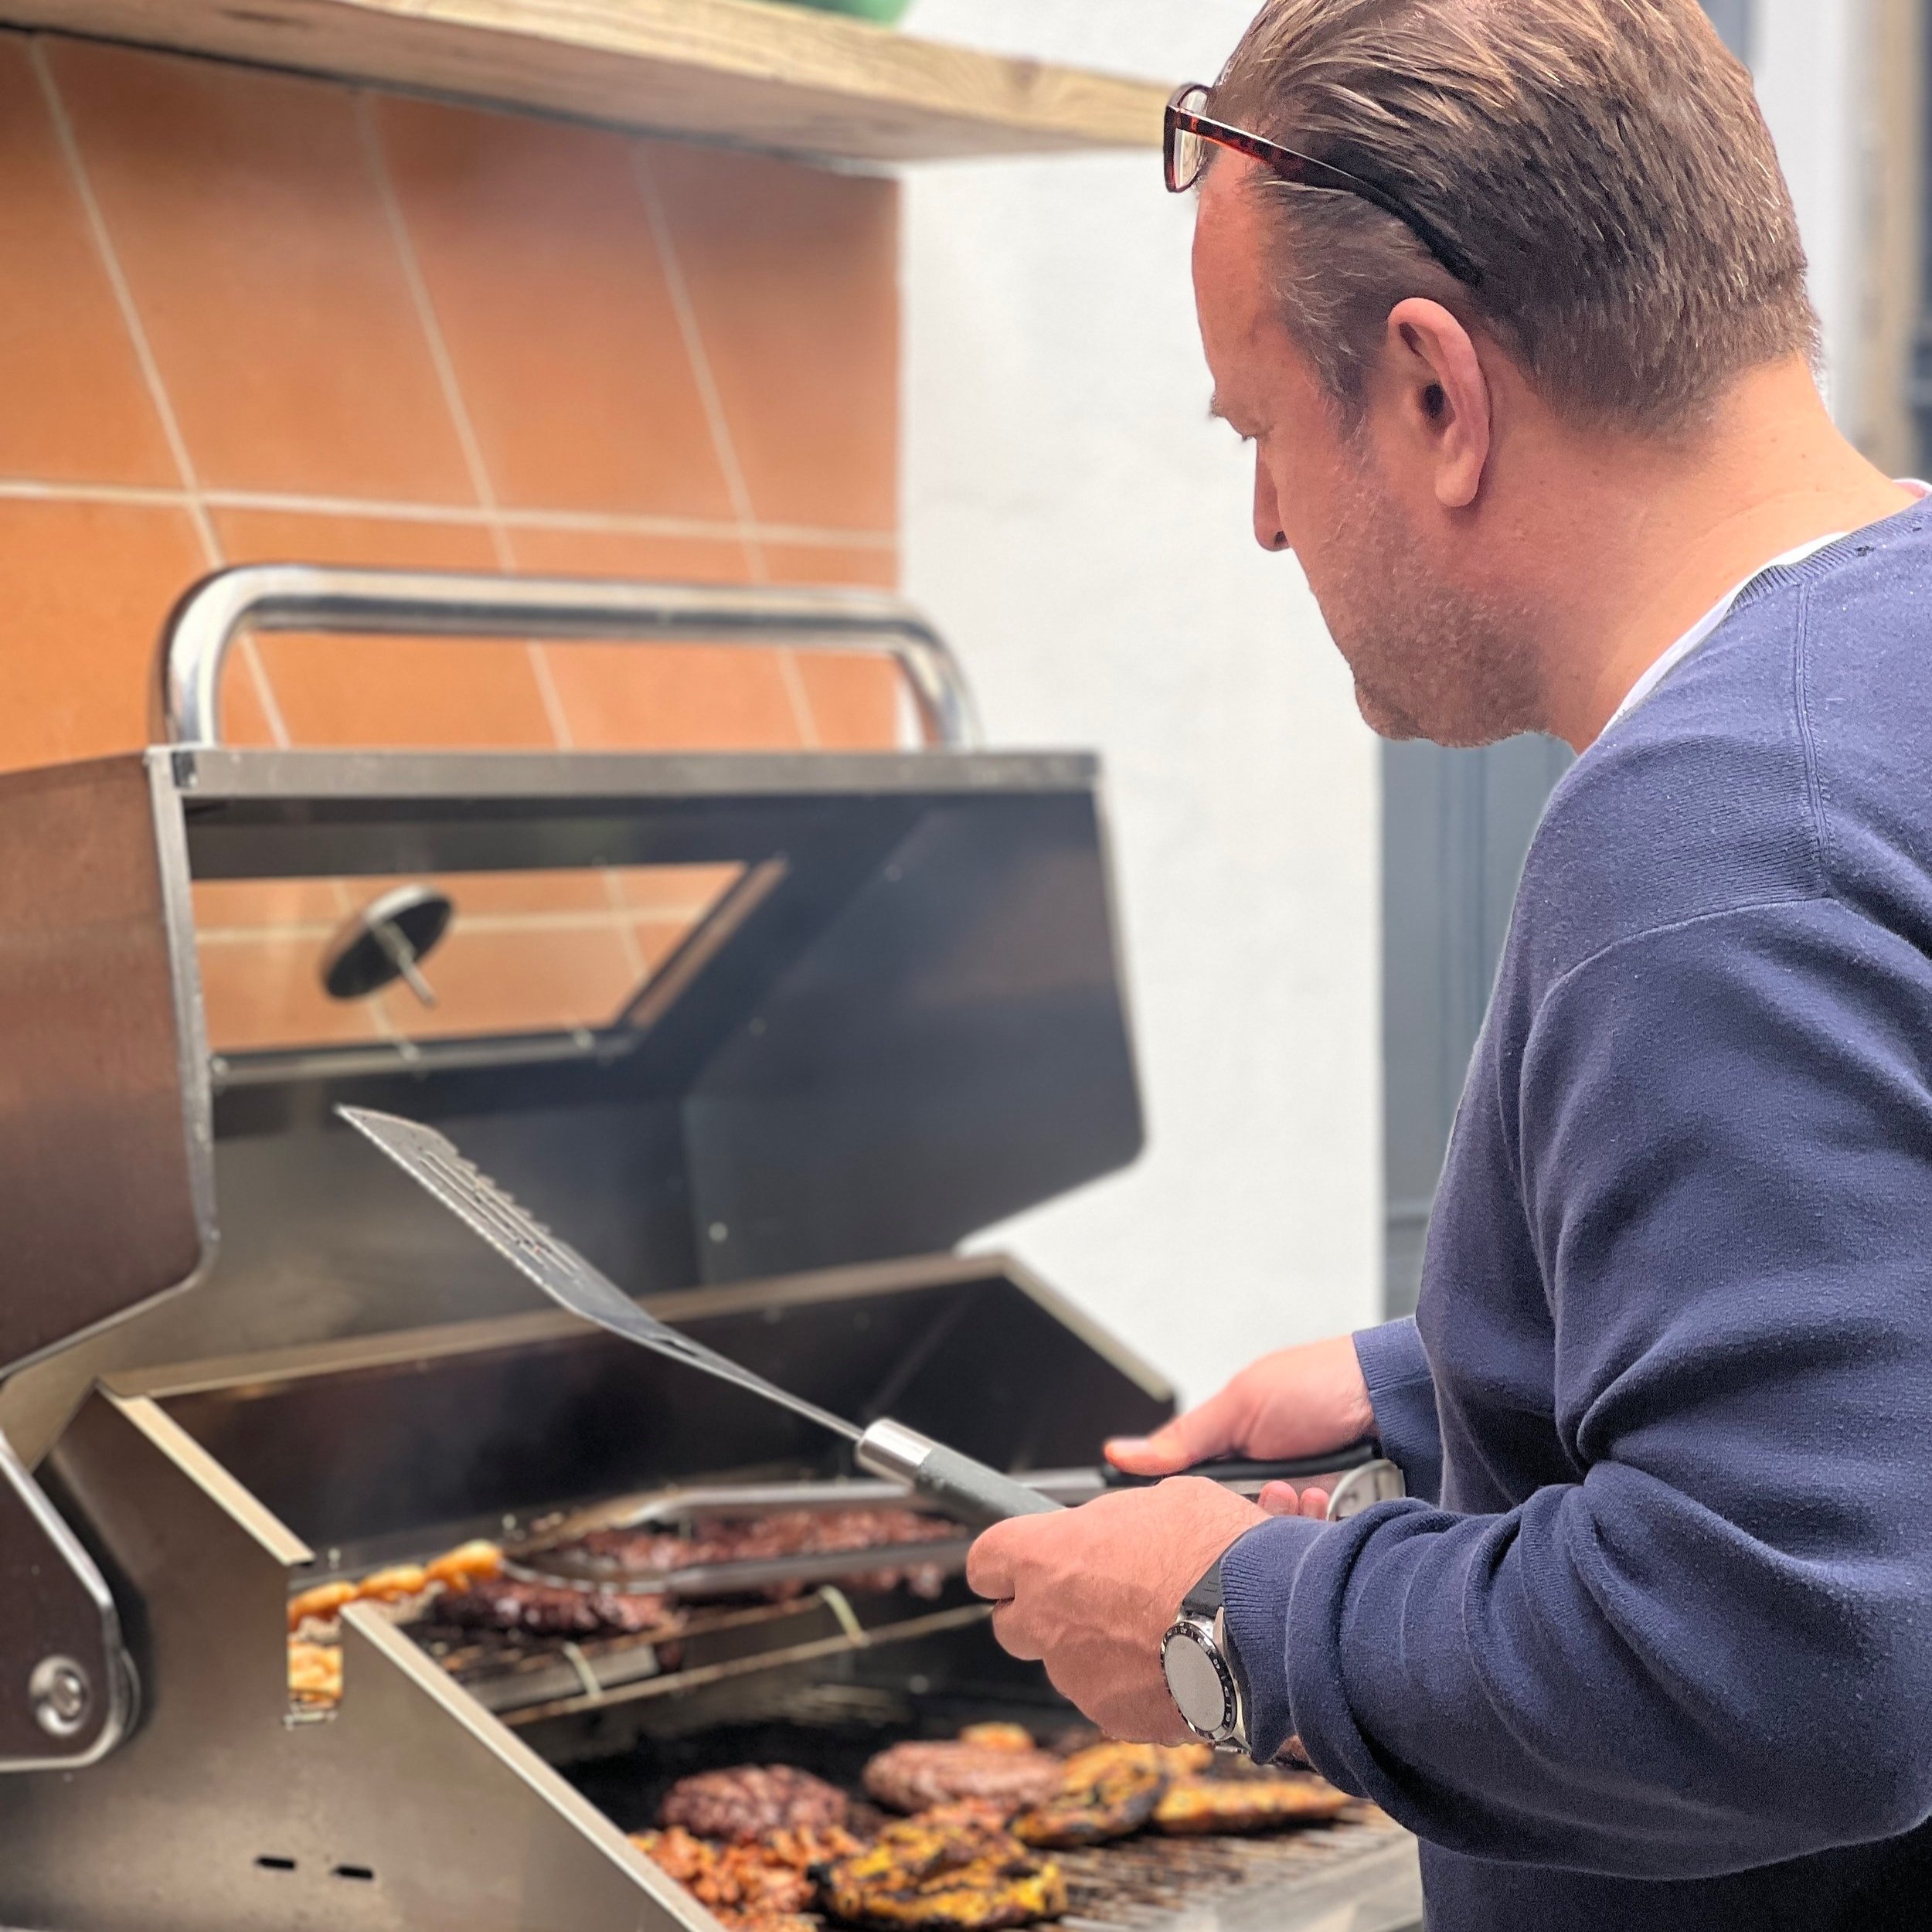
Anyway, since my Dad died in 2008, Joe has taken on the mantle of BBQer supreme for our immediate family with relish. He has surprisingly successfully BBQ’d the turkey for many years, although I have to say that his skill lies in the cooking itself and not in ANY WAY the preparation. We once got to Christmas Day before he realised that he had forgotten to invest in briquettes and he appears to be incapable of cleaning the BBQ itself without me threatening to divorce him. Since we moved here to York, he has worked his cooking magic on both a gas BBQ and a charcoal kettle but his lack of preparation and organisation has not boded well from a neatness perspective.
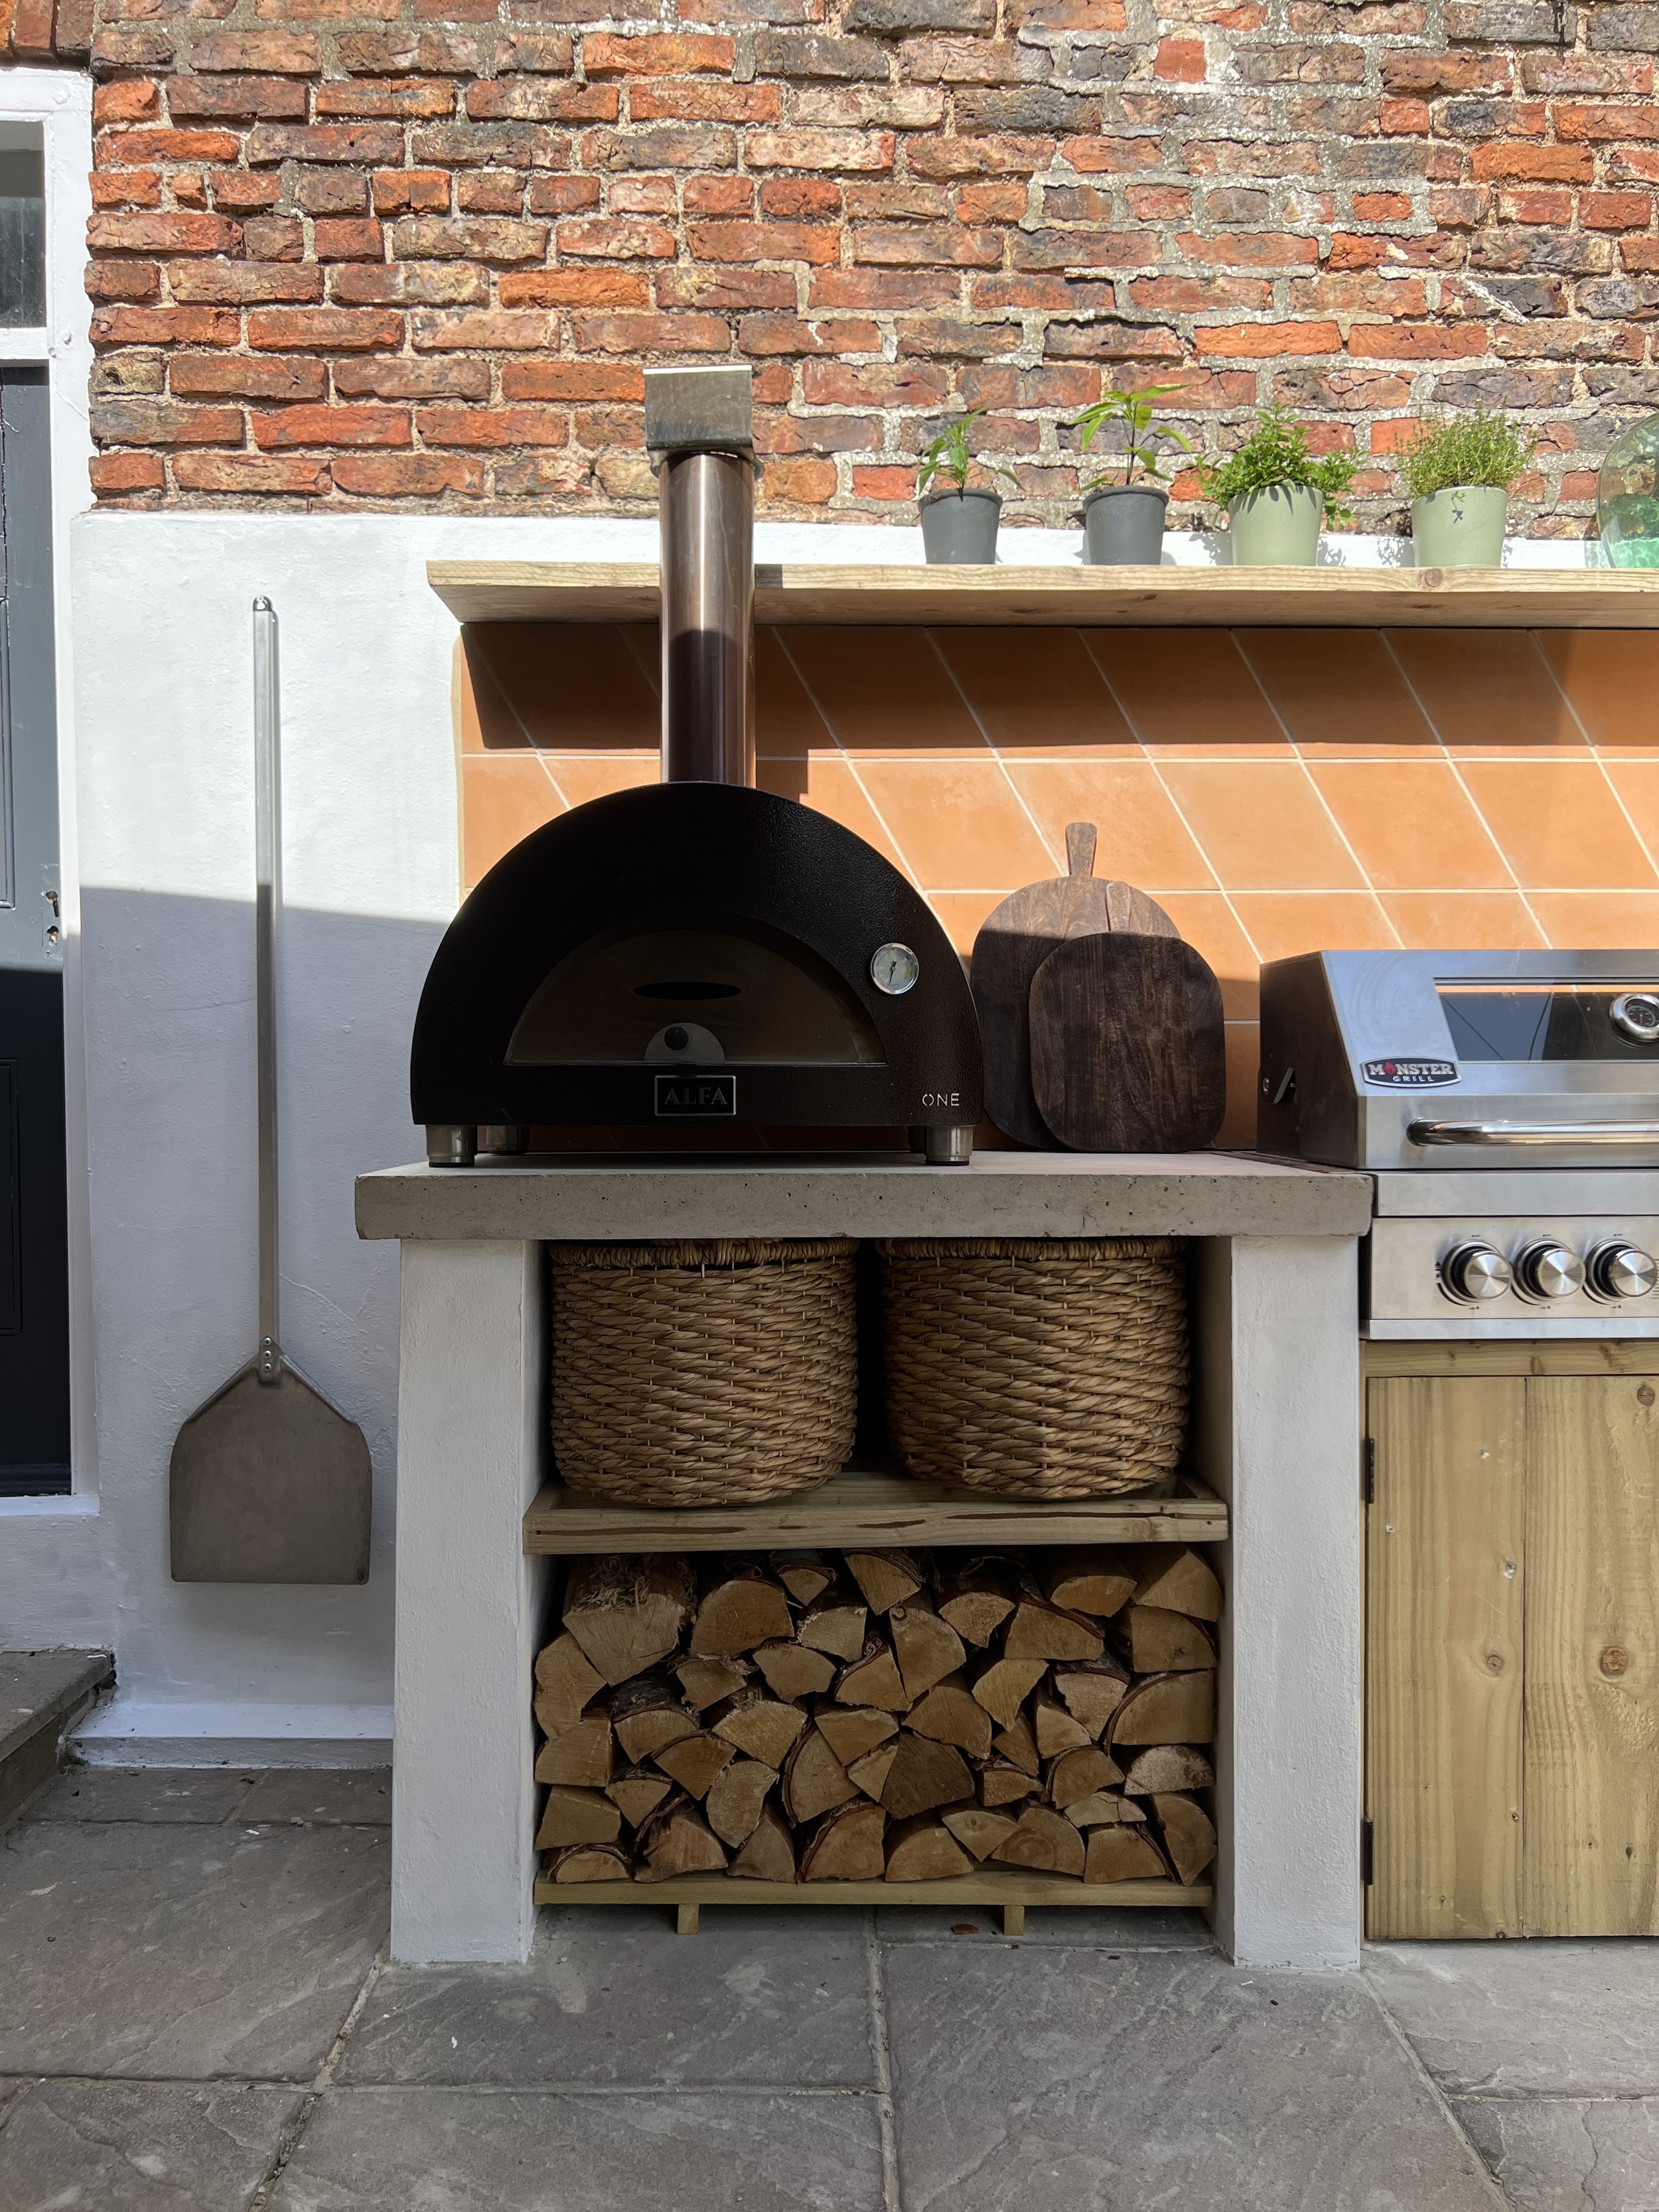
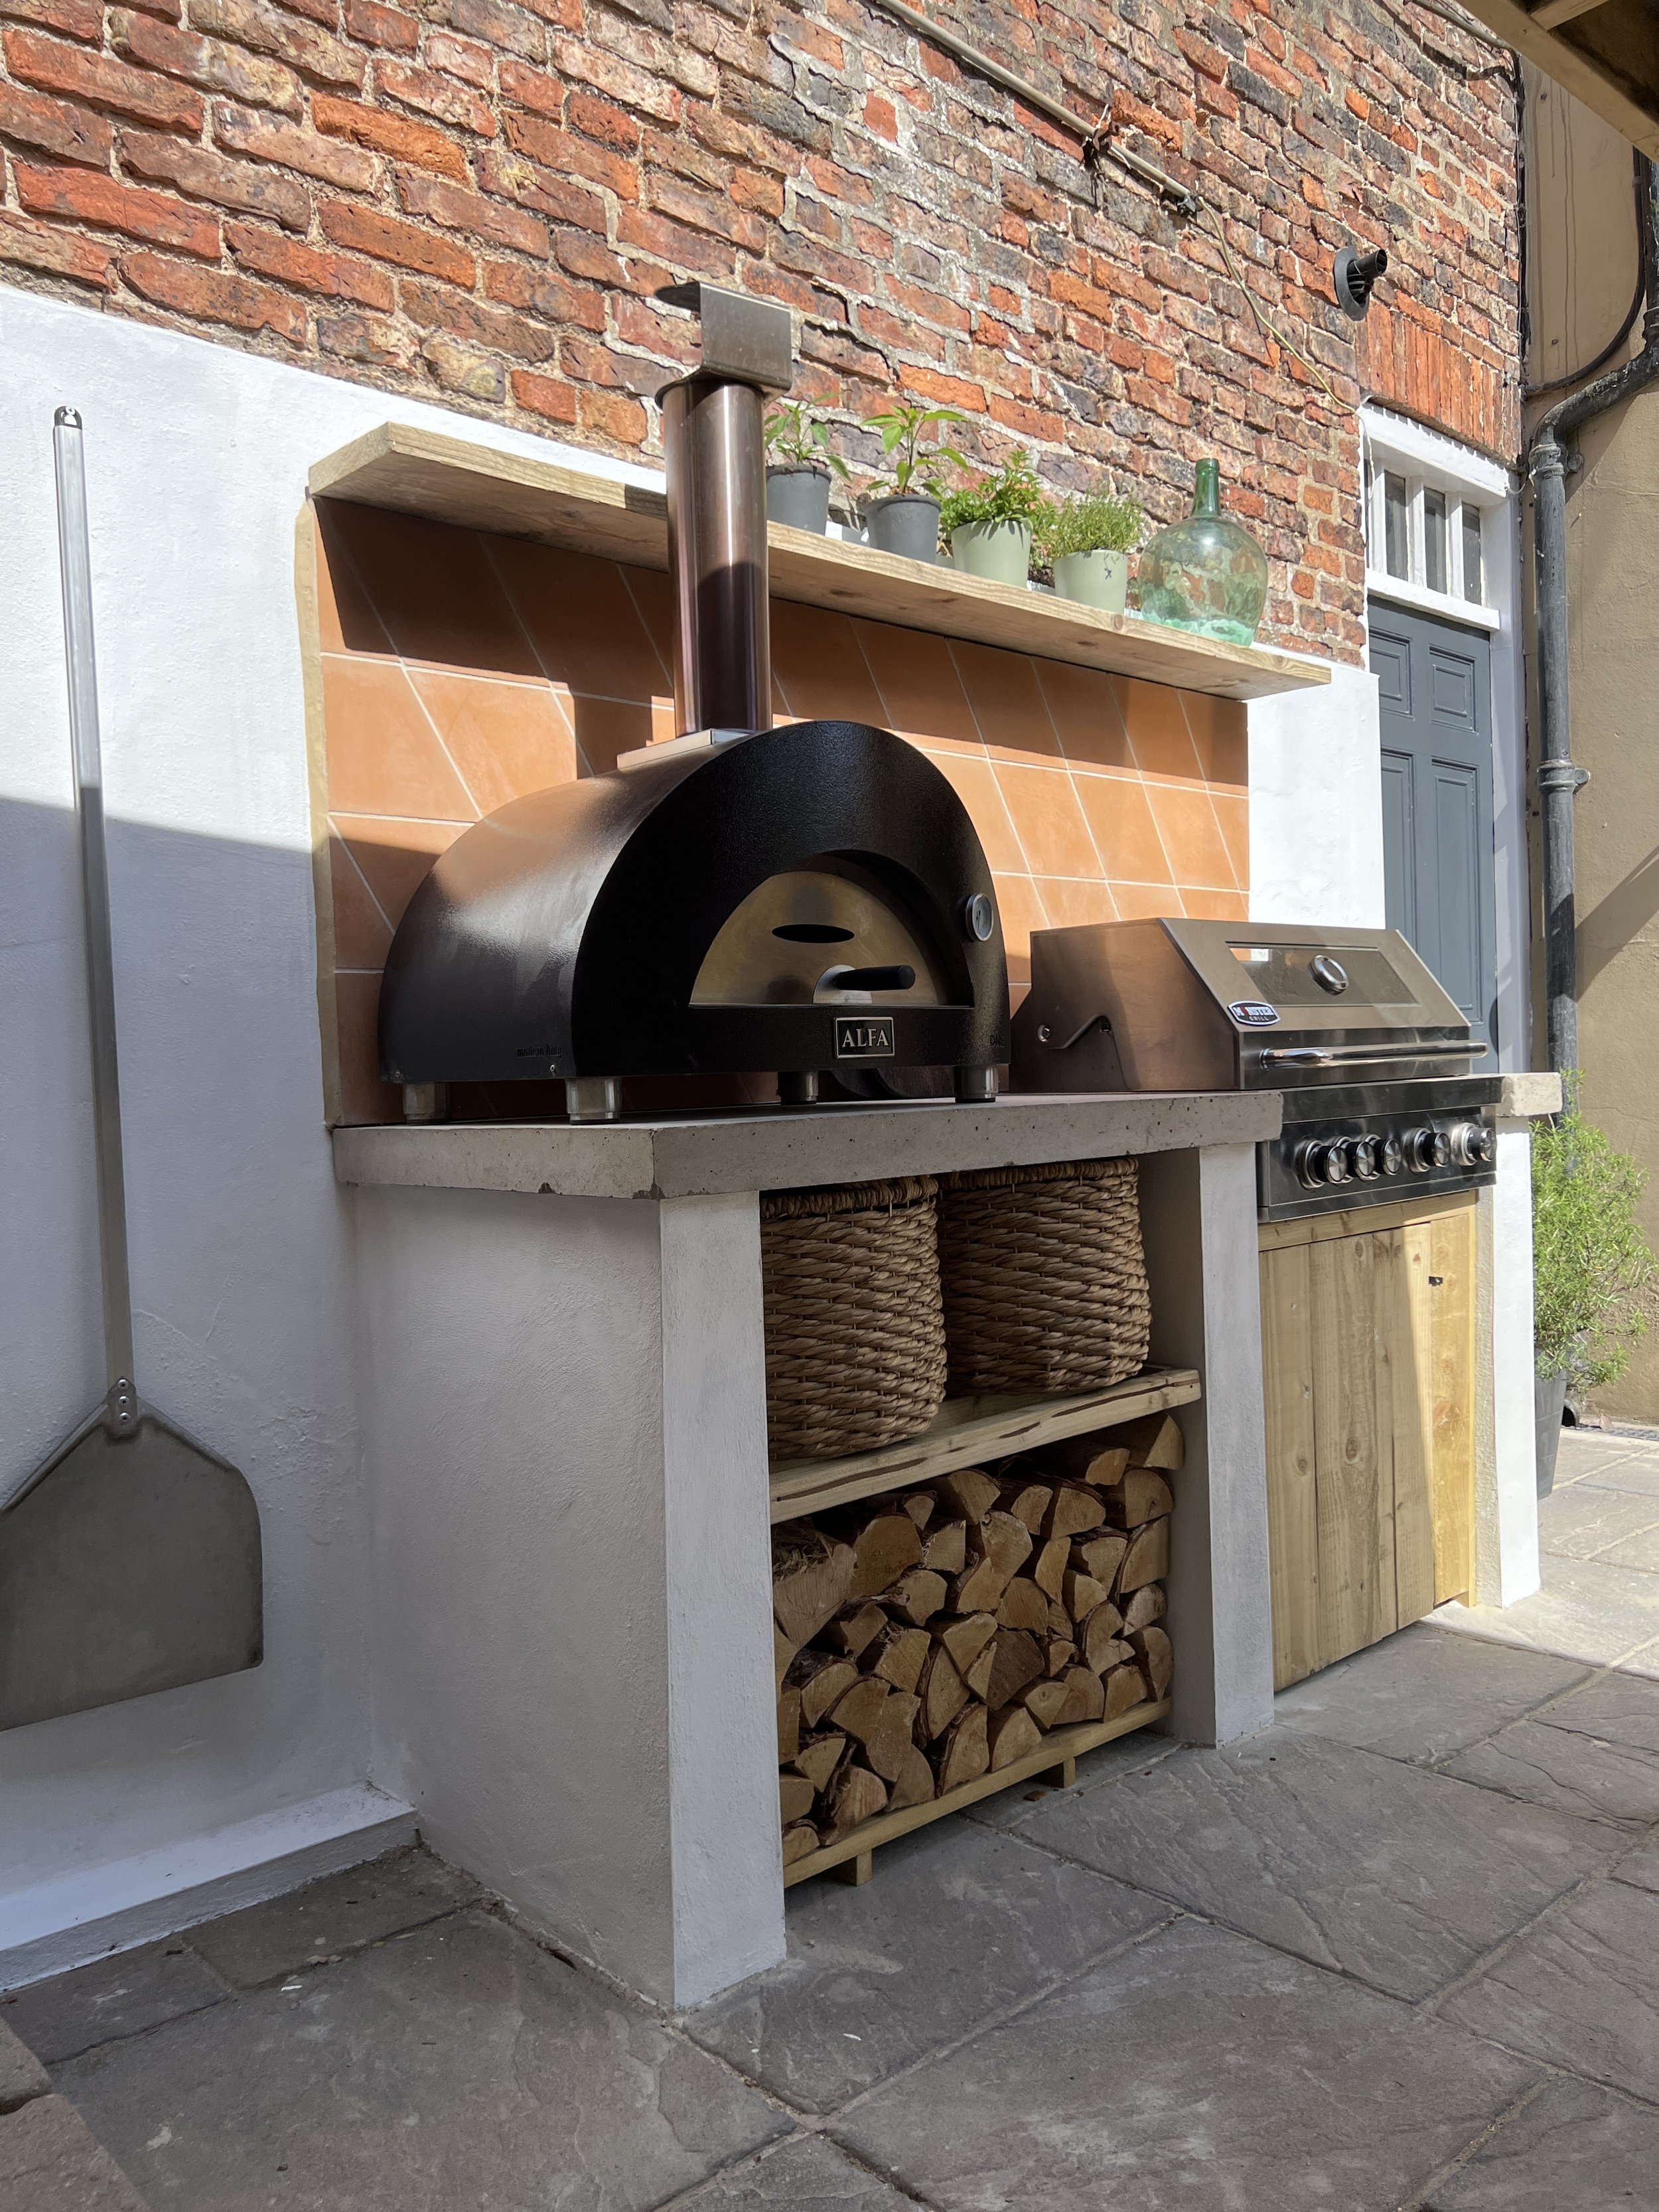
After perusing Pinterest for many days, I decided that my next project would be an outdoor kitchen, complete with storage beneath for both the very unattractive gas canister and the paper bags of charcoal briquettes which always end up falling apart and scattering black balls over the patio after being carelessly left out the in rain. I decided on this in the hope that Joe would a) cook more and b) become a tidier person, although I am well aware that miracles rarely happen. I didn’t want to build a full on hardcore kitchen - mostly because it would be hugely expensive and fiddly - but basically a concrete bench on which to house a gas BBQ and the pizza oven, with storage for all the necessary debris beneath. The kettle BBQ could remain free standing and I didn’t need a sink or drinks fridge or any of that malarkey. Simple was the way to go. Mike The Builder immediately drew up a plan that we both agreed on and work commenced. So how did we create something that would do the job yet didn’t cost the earth? Here’s the lowdown.
Planned It Out
The first thing we did is look at the space that I had available. My outdoor garden space is divided into two sections - one, a decking area accessed via steps that we use for lounge seating and two, a patio space beneath that is closer to the house and which we use for dining. Both of these spaces are covered with hard roof pergolas which we had made around five years ago. You can see how they were designed and built here in this blog and you can also get an idea of how the outside space flows by clicking here to see a video Reel. There’s a wall in the dining area which divides it from the internal courtyard and it was against this wall that the outdoor kitchen would go. We measured the space that we had available - around 200cm - and decided that it would be divided into two halves. One side would be a solid concrete top for the pizza oven and the second would have a gap in which to drop the new gas BBQ. Beneath the BBQ would be a wooden door which would have storage behind and beneath the pizza oven would be two shelves - one for basket storage and one for logs. A scaffold shelf would sit above the bench with tiles in-between. And that, really, was it.
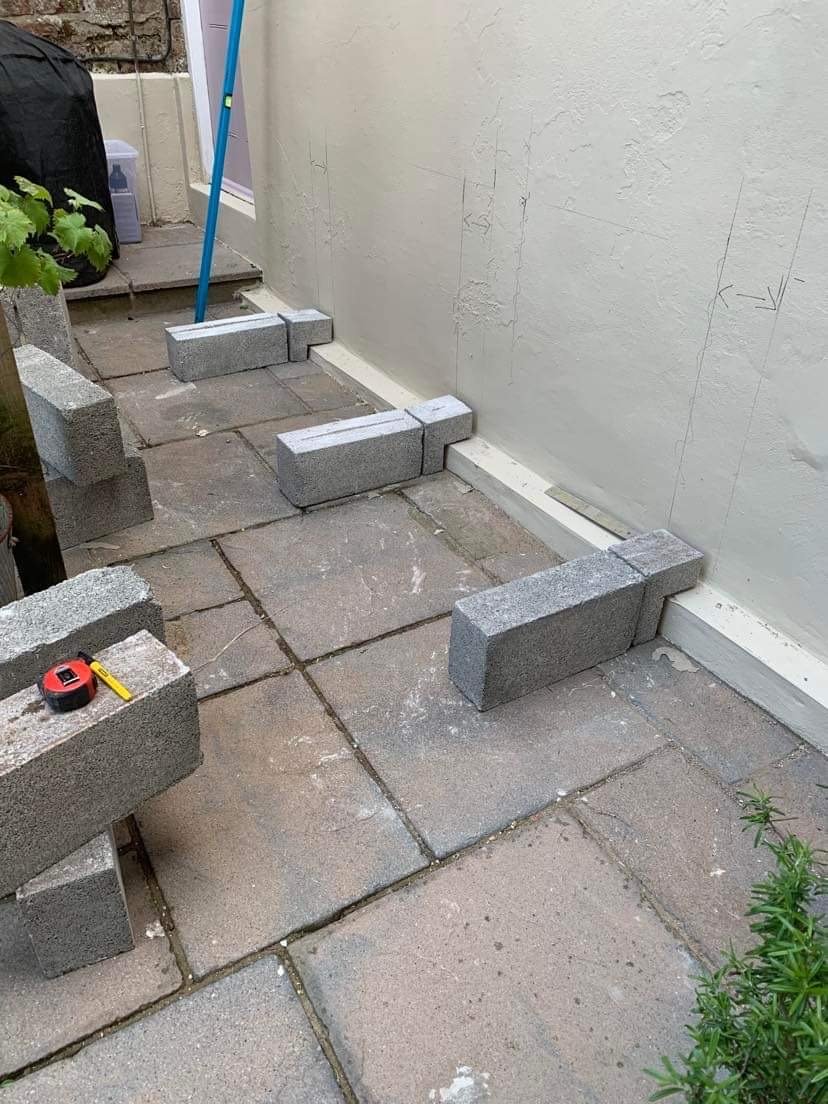
Built The Pillars
So there were three pillars - left, central and right. We used breeze blocks to create the structure used breeze blocks to create the structure - standard dense heavy footing blocks 120 wide, 450 x 200 - six blocks per pillar. The patio was on a slight incline so we needed to make sure that it was all level. The breeze blocks were rendered in concrete to create a textured finish. The weather was warm so it didn’t take long for the concrete to dry.


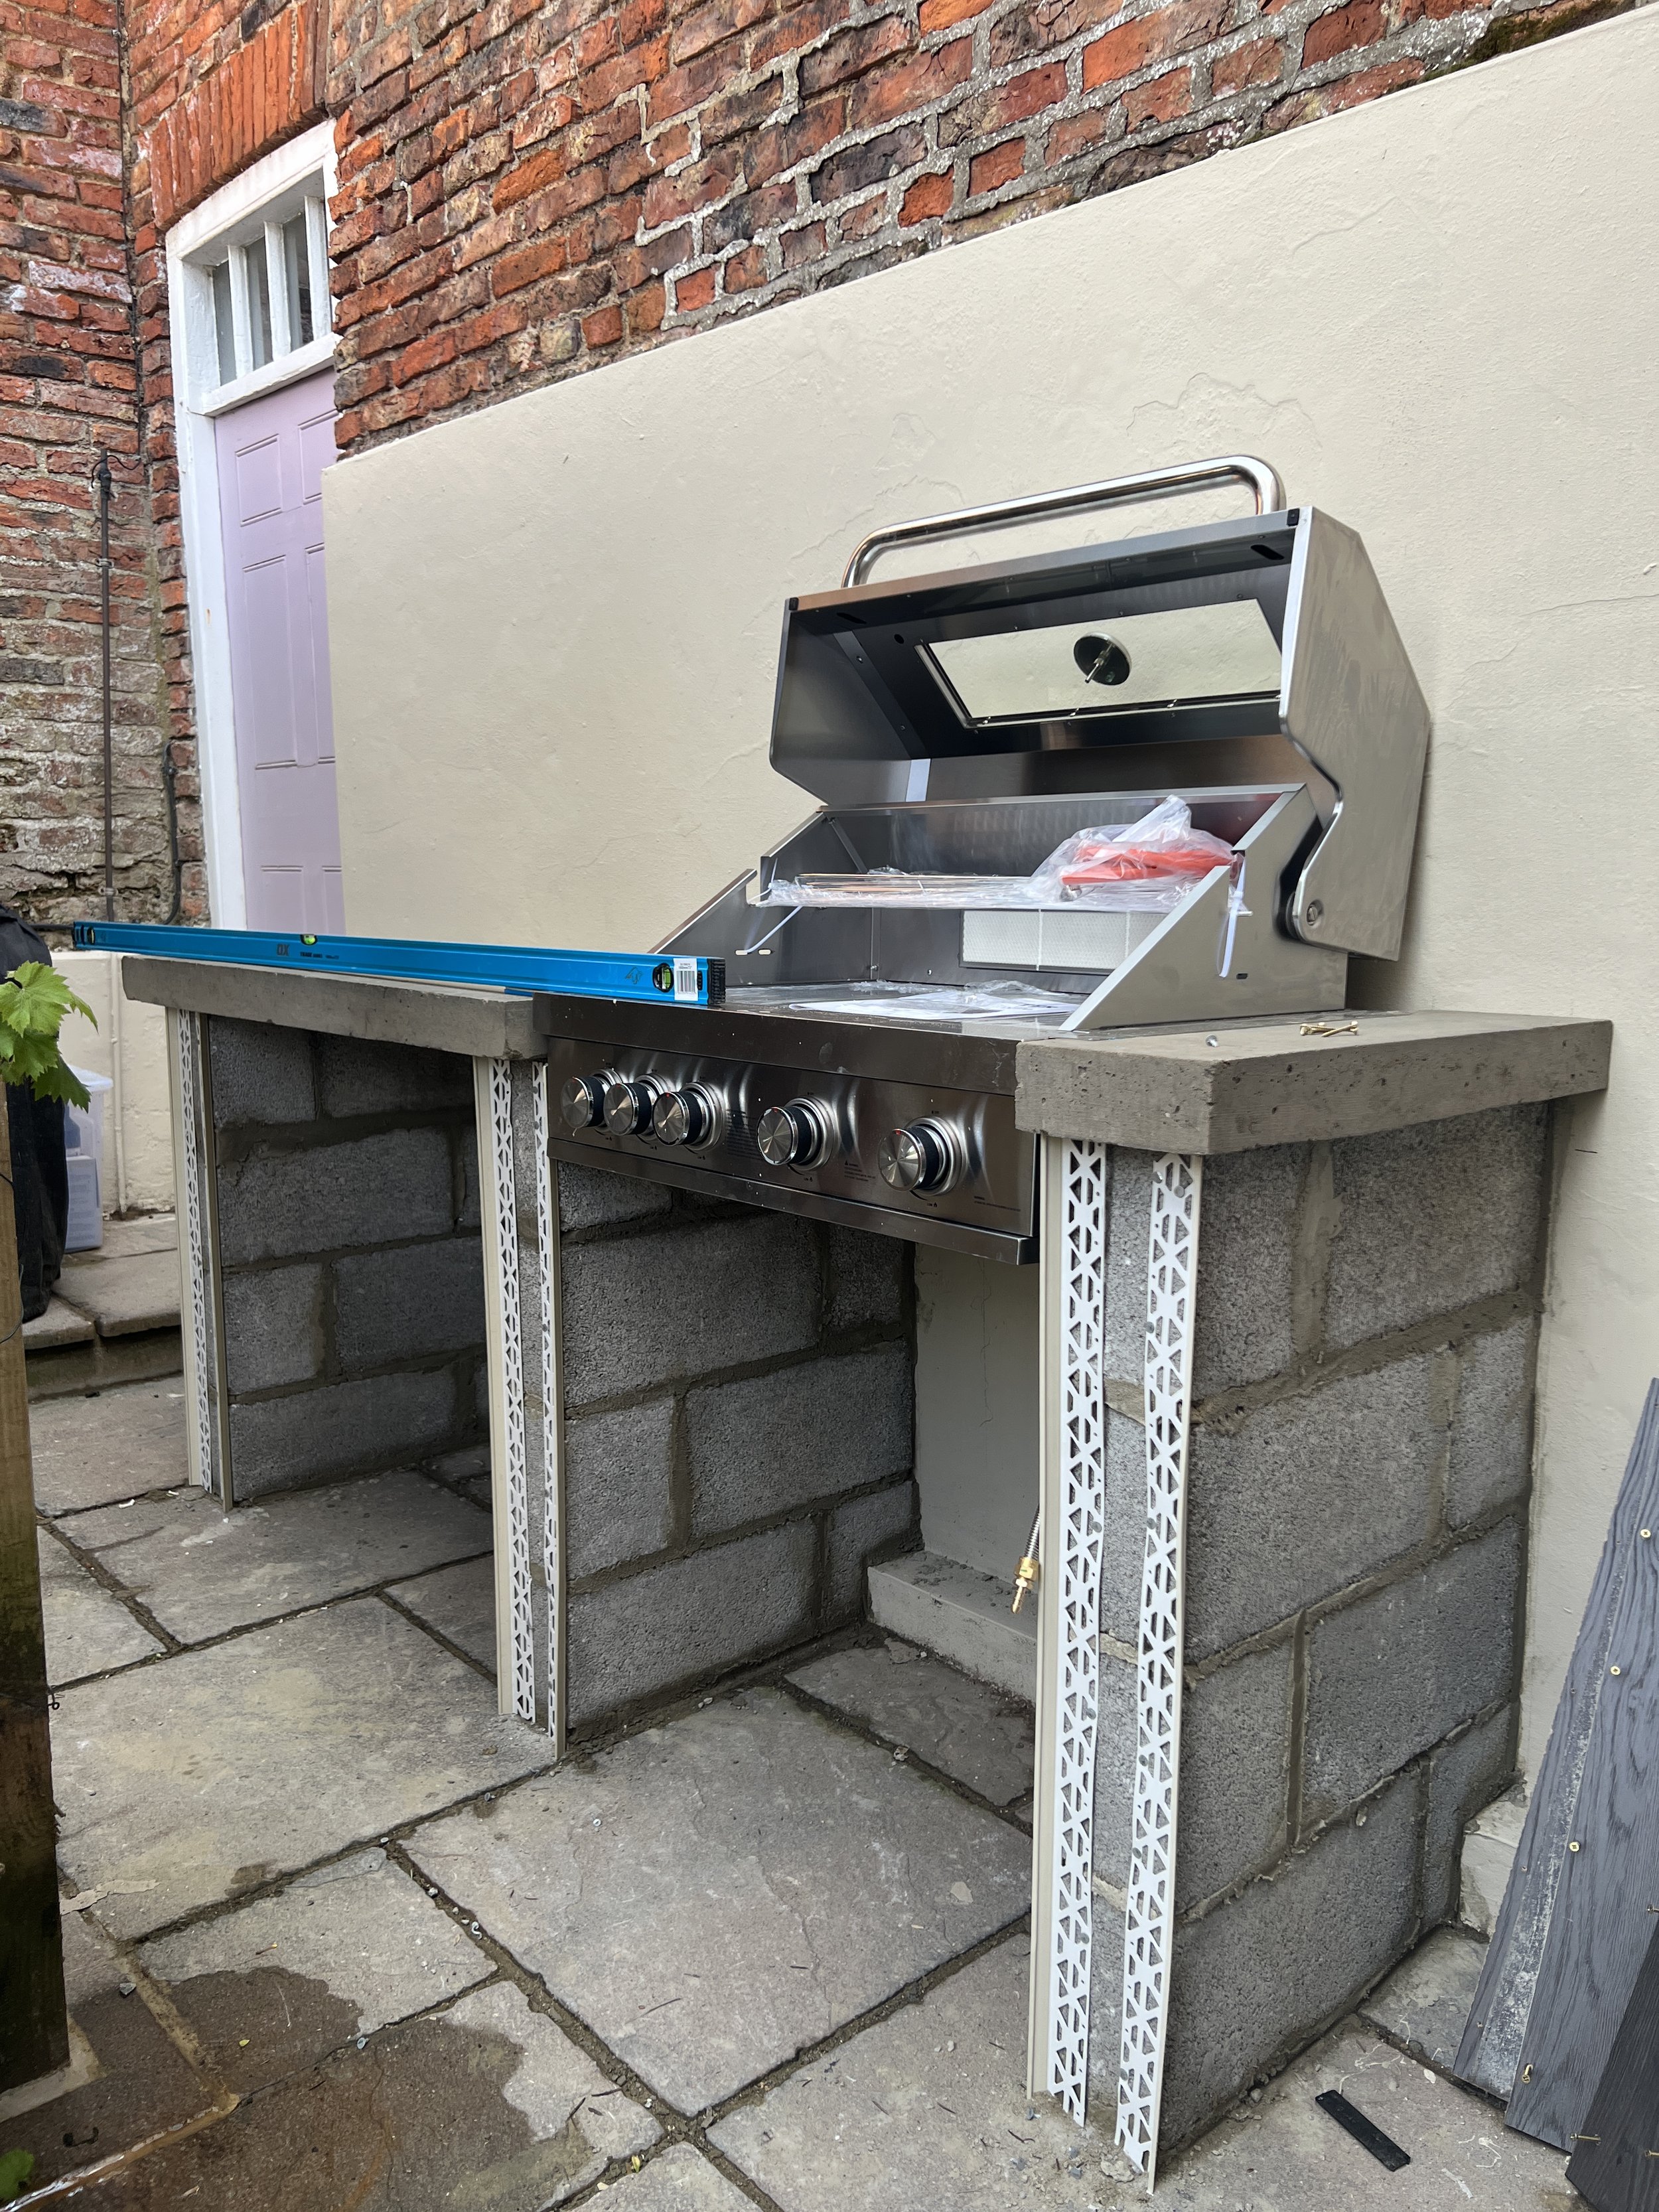
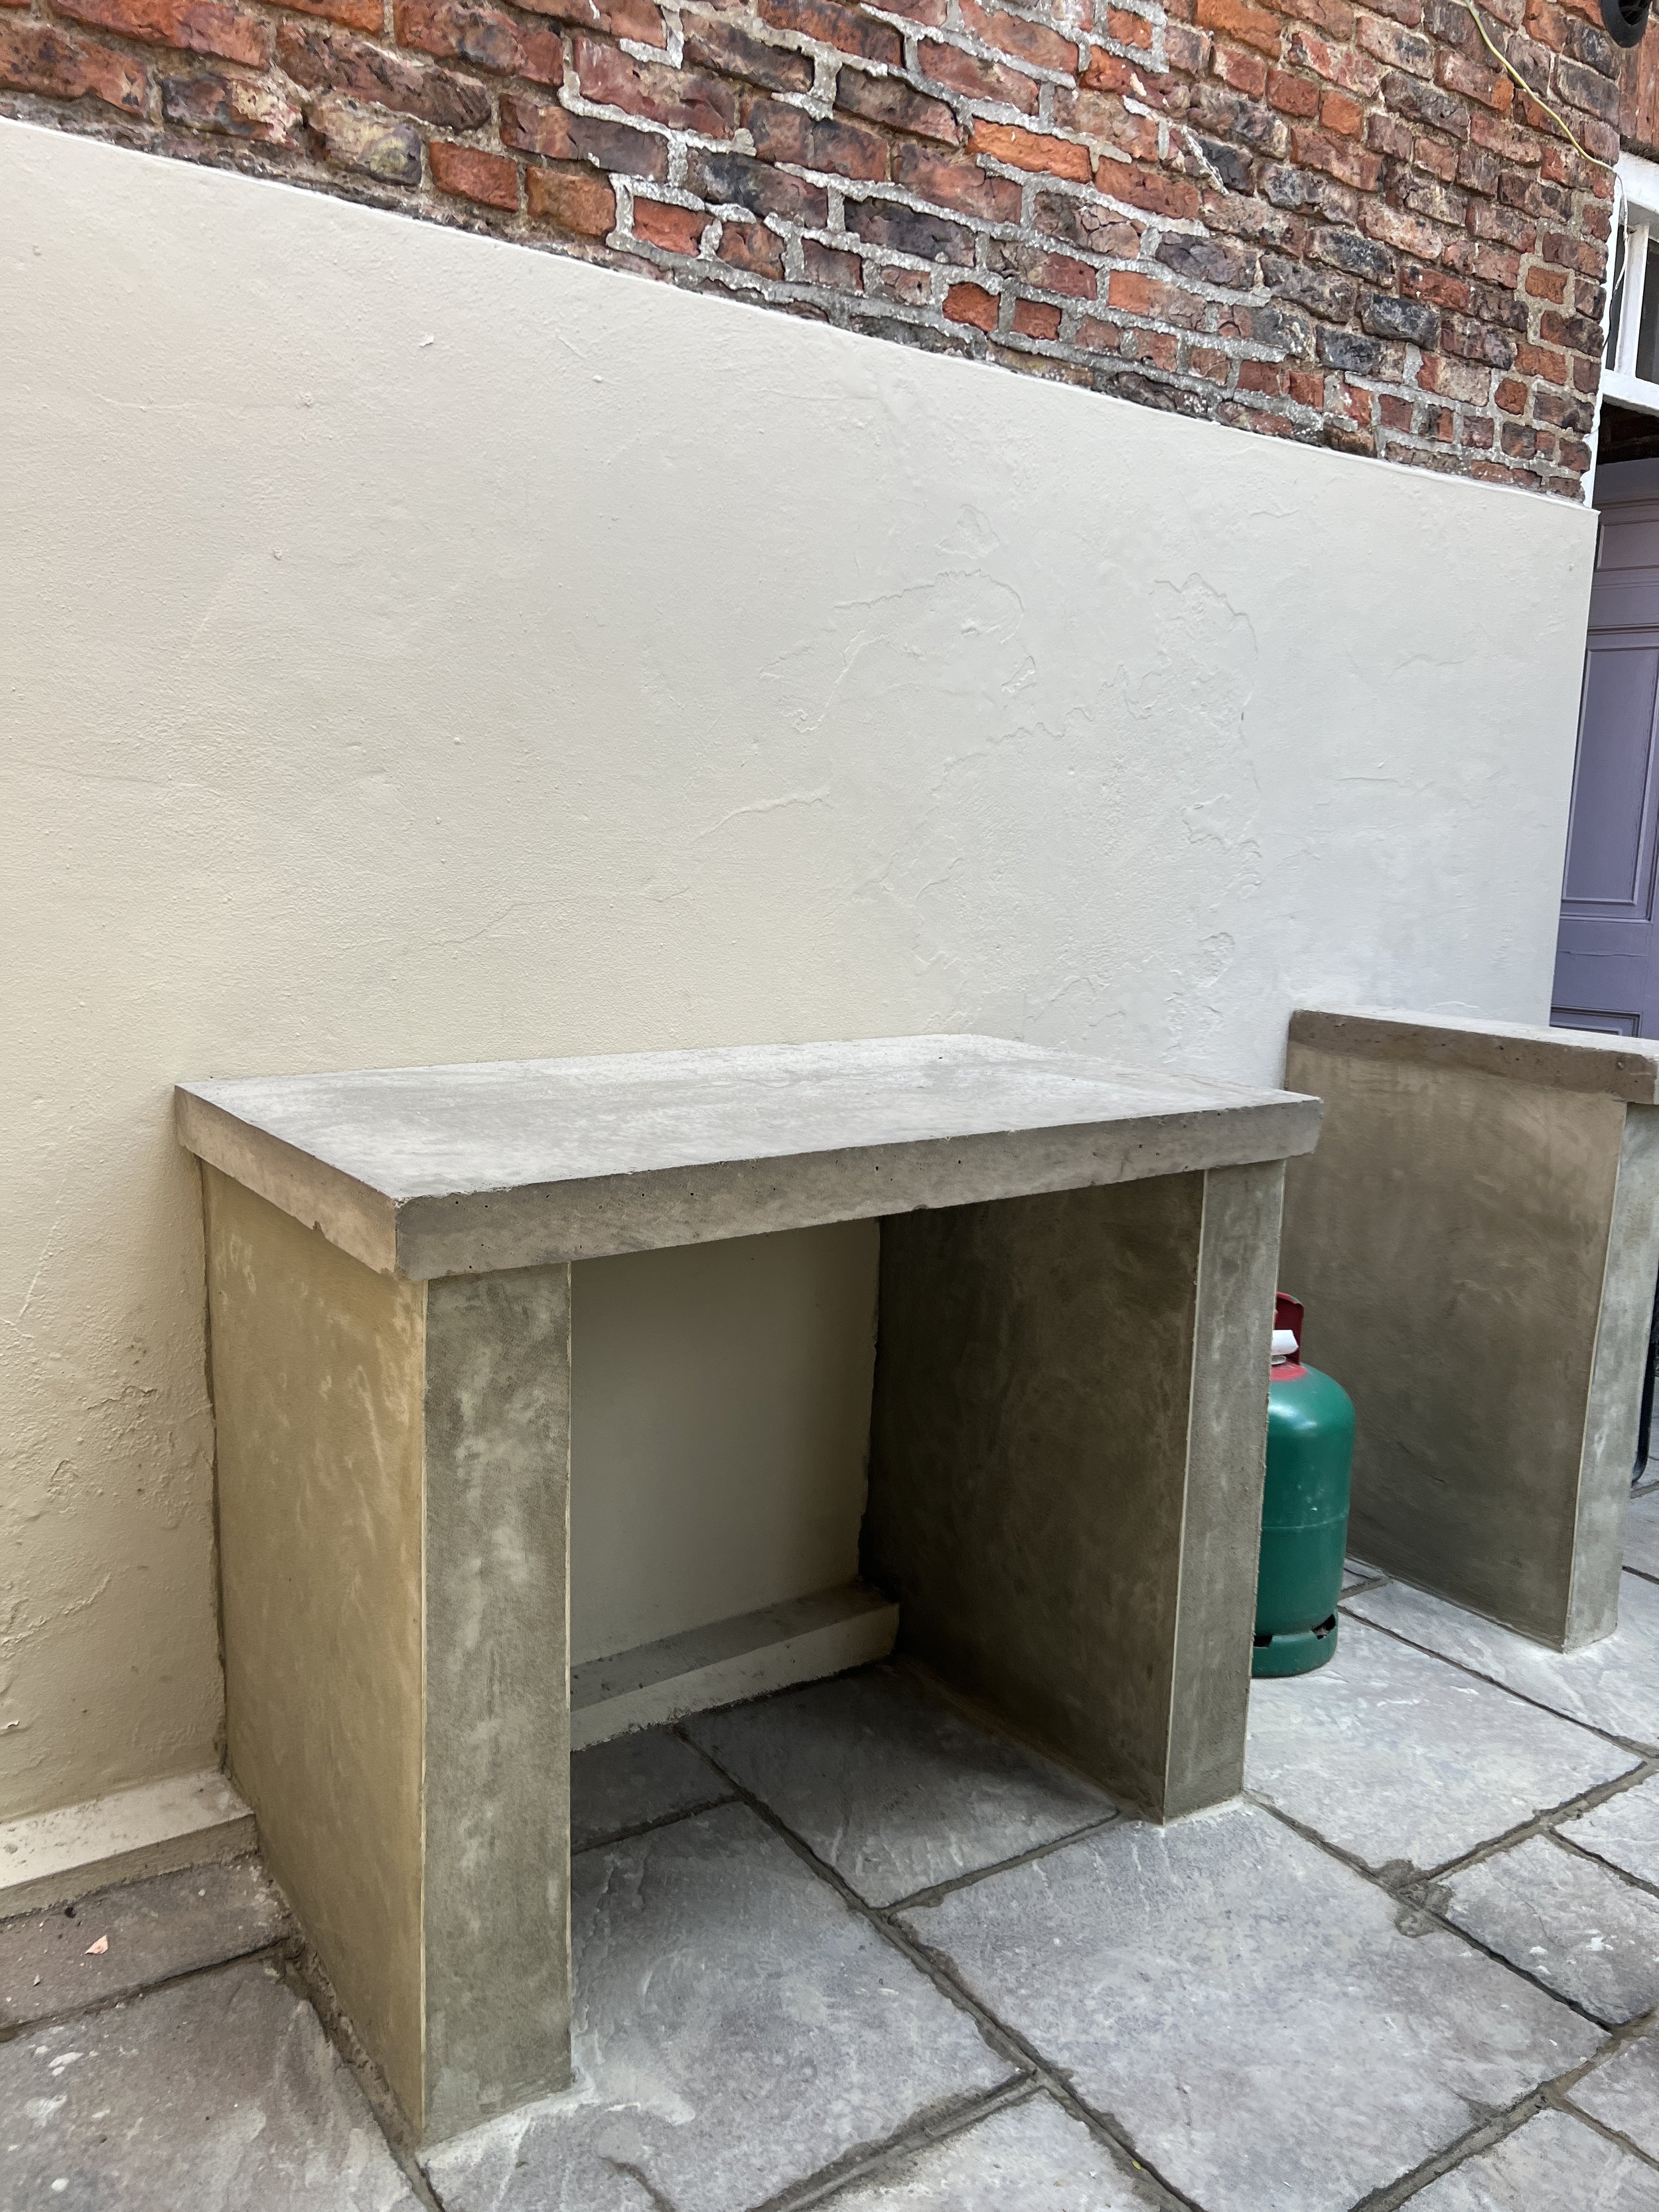
Made A Concrete Top
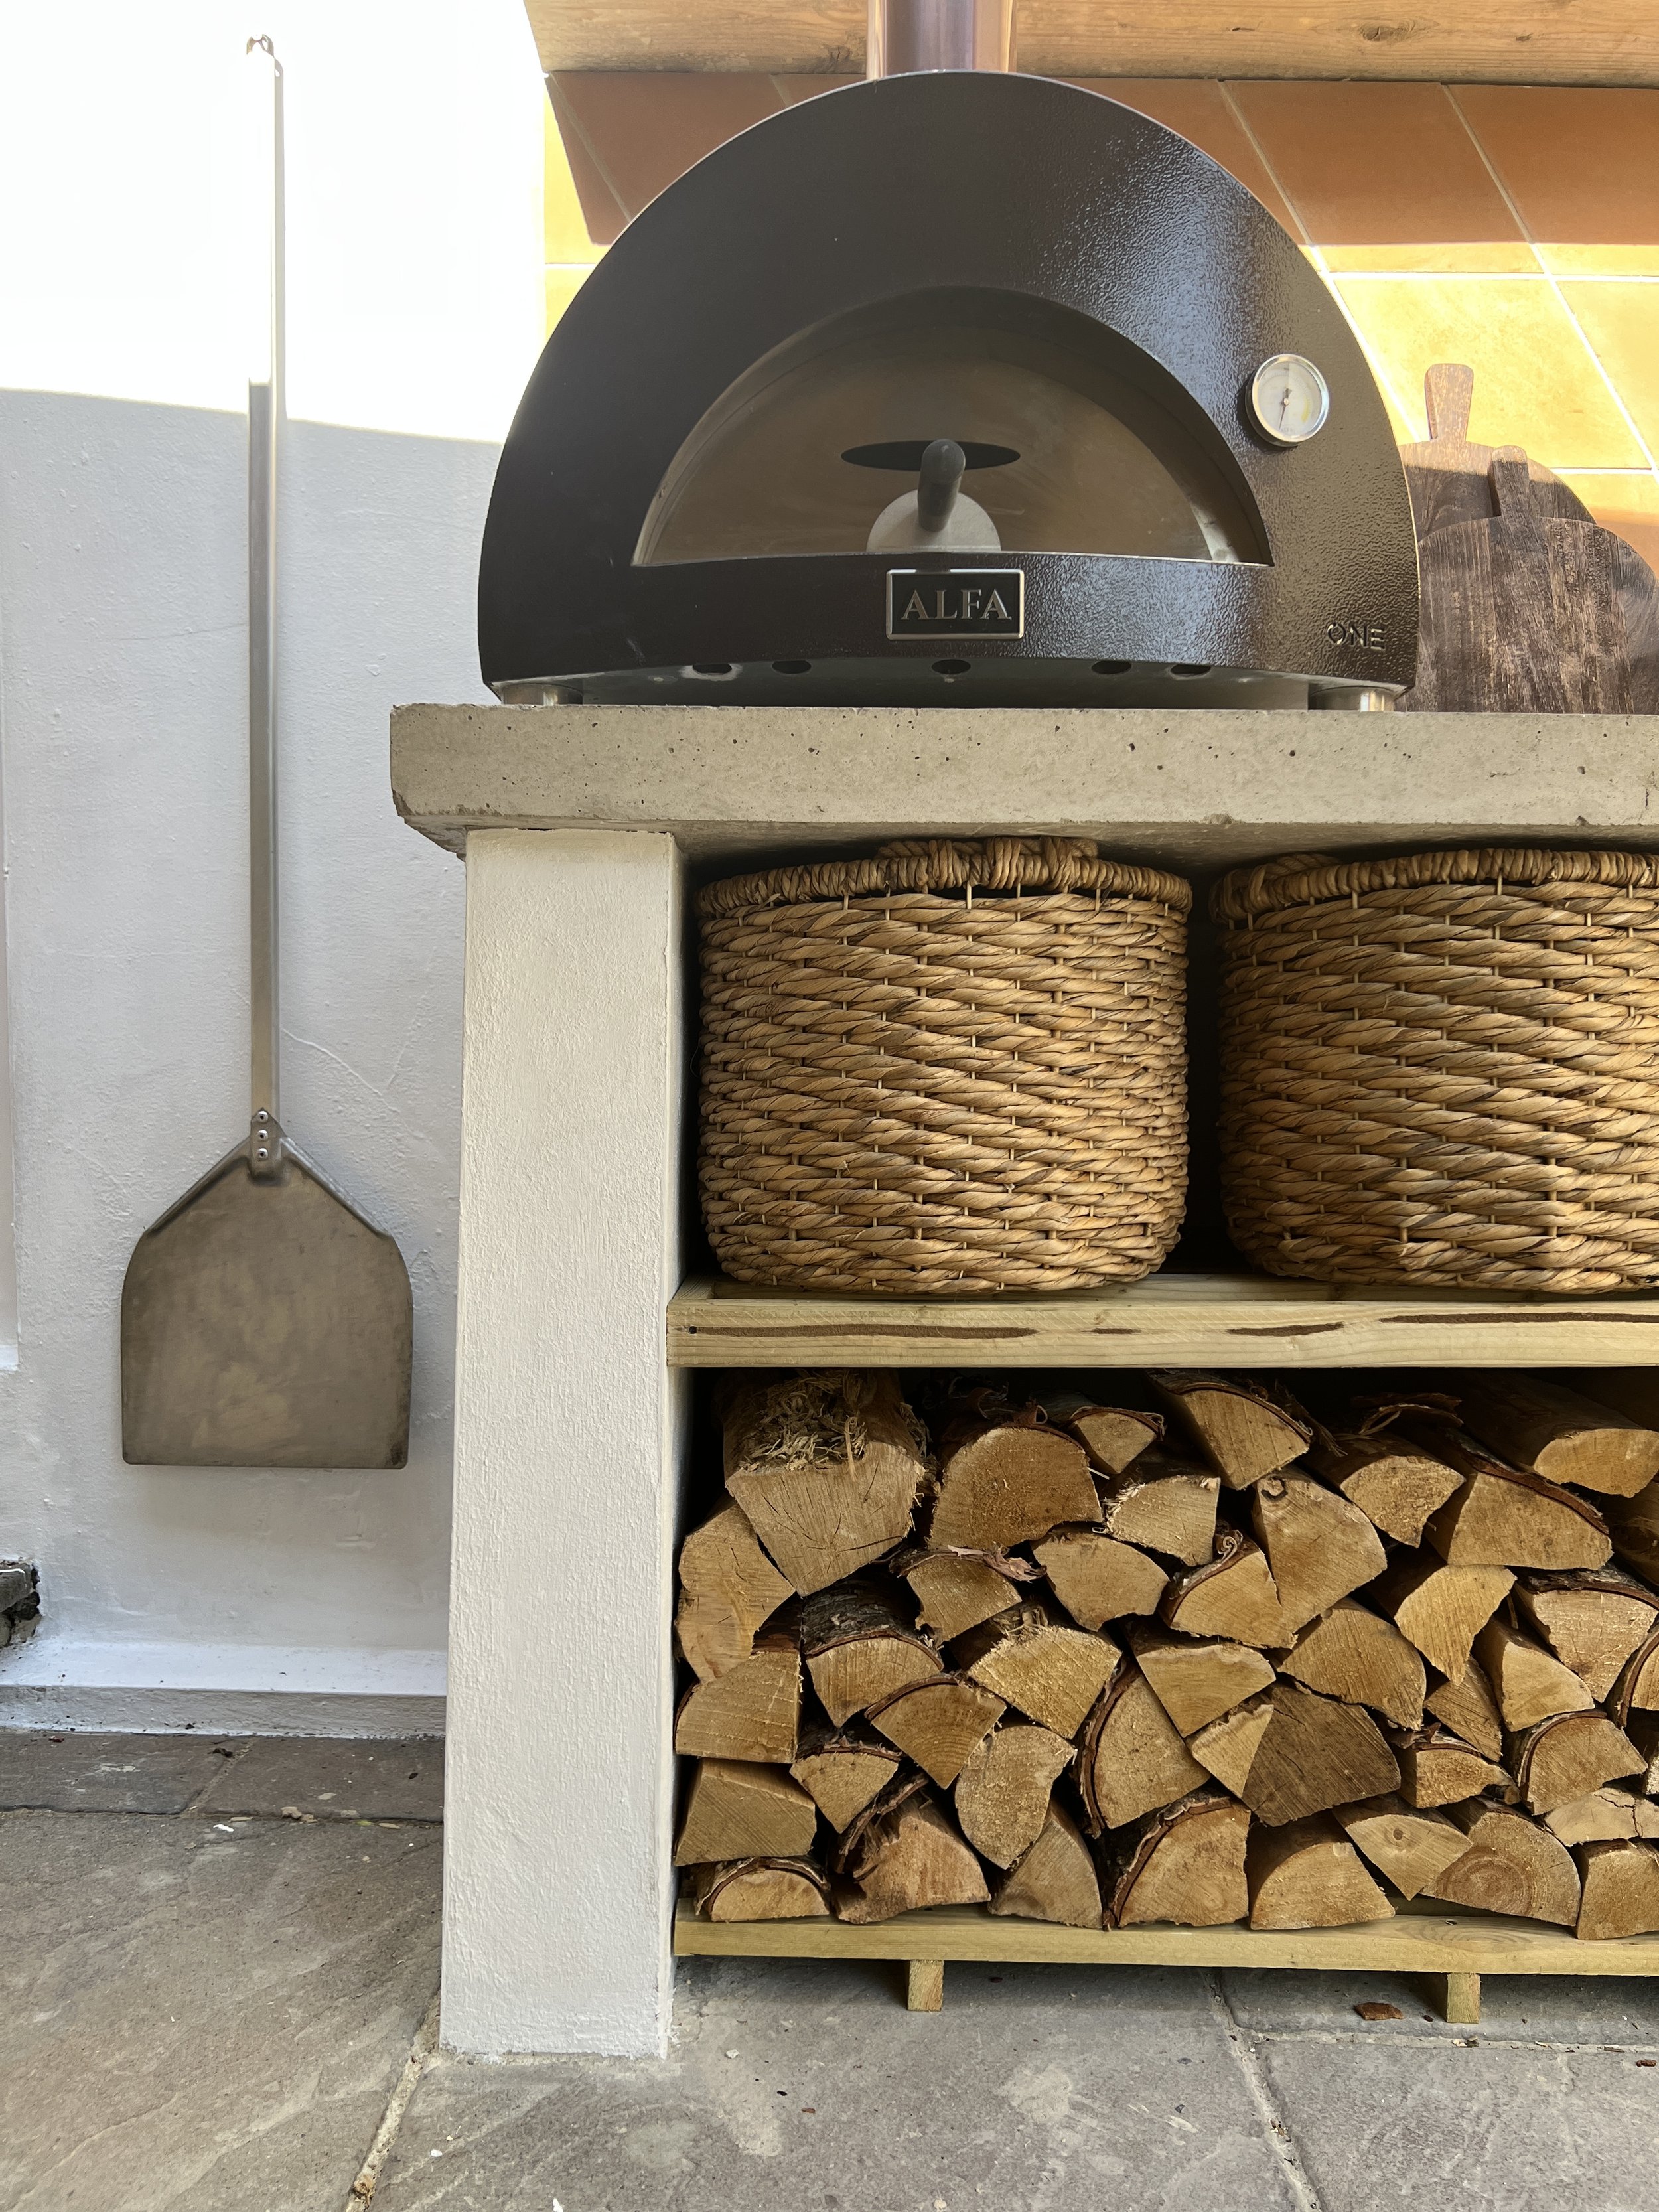
There needed to be two sections of concrete top - one large piece for the left hand section and a smaller piece that would sit on the far right to hold the BBQ edge. Mike made two trays exactly to the correct size out of melamine - the main piece of worktop was 800 deep, 1200 wide and 80mm thick. The melamine was from B&Q and Mike used this to ensure the concrete worktop finish was smooth and flat. The concrete was then poured in to set. It took a couple of days but both pieces came out perfectly. Again, the weather was on our side so it wasn’t long before it was dried out. Once set, the concrete needed to be sealed before it could be used otherwise it would remain porous and immediately stain (important that the concrete is completely dry before this is done). It had two coats and was then ready to be used.
Added The Cooking Equipment
The left section was for the pizza oven. I’ve had it a couple of years and it still makes perfect pizzas but not only that, you can basically cook anything in it - they’re a good long term investment. My one is from Home Pizza Ovens and it’s an Alfa Forni Nano without the base. Mike had built the right hand section based on the measurements of the BBQ. I found the perfect one online at Appliance Direct - it’s a Monster Grill four burner which integrates into any bench/worktop situation. They have a few available and all have measurements clearly on the page which means you can plan for its arrival in advance by making the space to measure as we did. I liked this one as it’s nice and simple and also wasn’t hugely expensive compared to others. I considered the Pinterest popular Egg and although it looked great, I knew that there was no way in hell that Joes usage would justify such a purchase as cooking on it looked far more complicated than simply turning an ignition dial. Why make his life more complicated. Ha.
Decided On Tiles
I wanted to add tiles between the concrete top and the scaffold shelf that would go above. I was keen to bring in lots of natural tones and colours - think sun drenched Ibizan bar with a large glass of cold rose and you’ll get my gist. I knew that Bert & May would have something that worked - the tiles in my courtyard are reclaimed terracotta from their selection and I love them - and I wasn’t wrong. They’ve just opened a new shop front in York so I was lucky enough to be able to go and seen the tile selection IRL. I decided on Marigold Diamond tiles and we laid them sloped for effect. I went for a sand coloured grout that contrasted perfectly and we grouted the edges too for a rustic look. Like the concrete worktop, the tiles needed to be sealed but it’s a quick job. In total I needed 40 tiles as the area was quite small - super pleased with them.

Reused What We Had
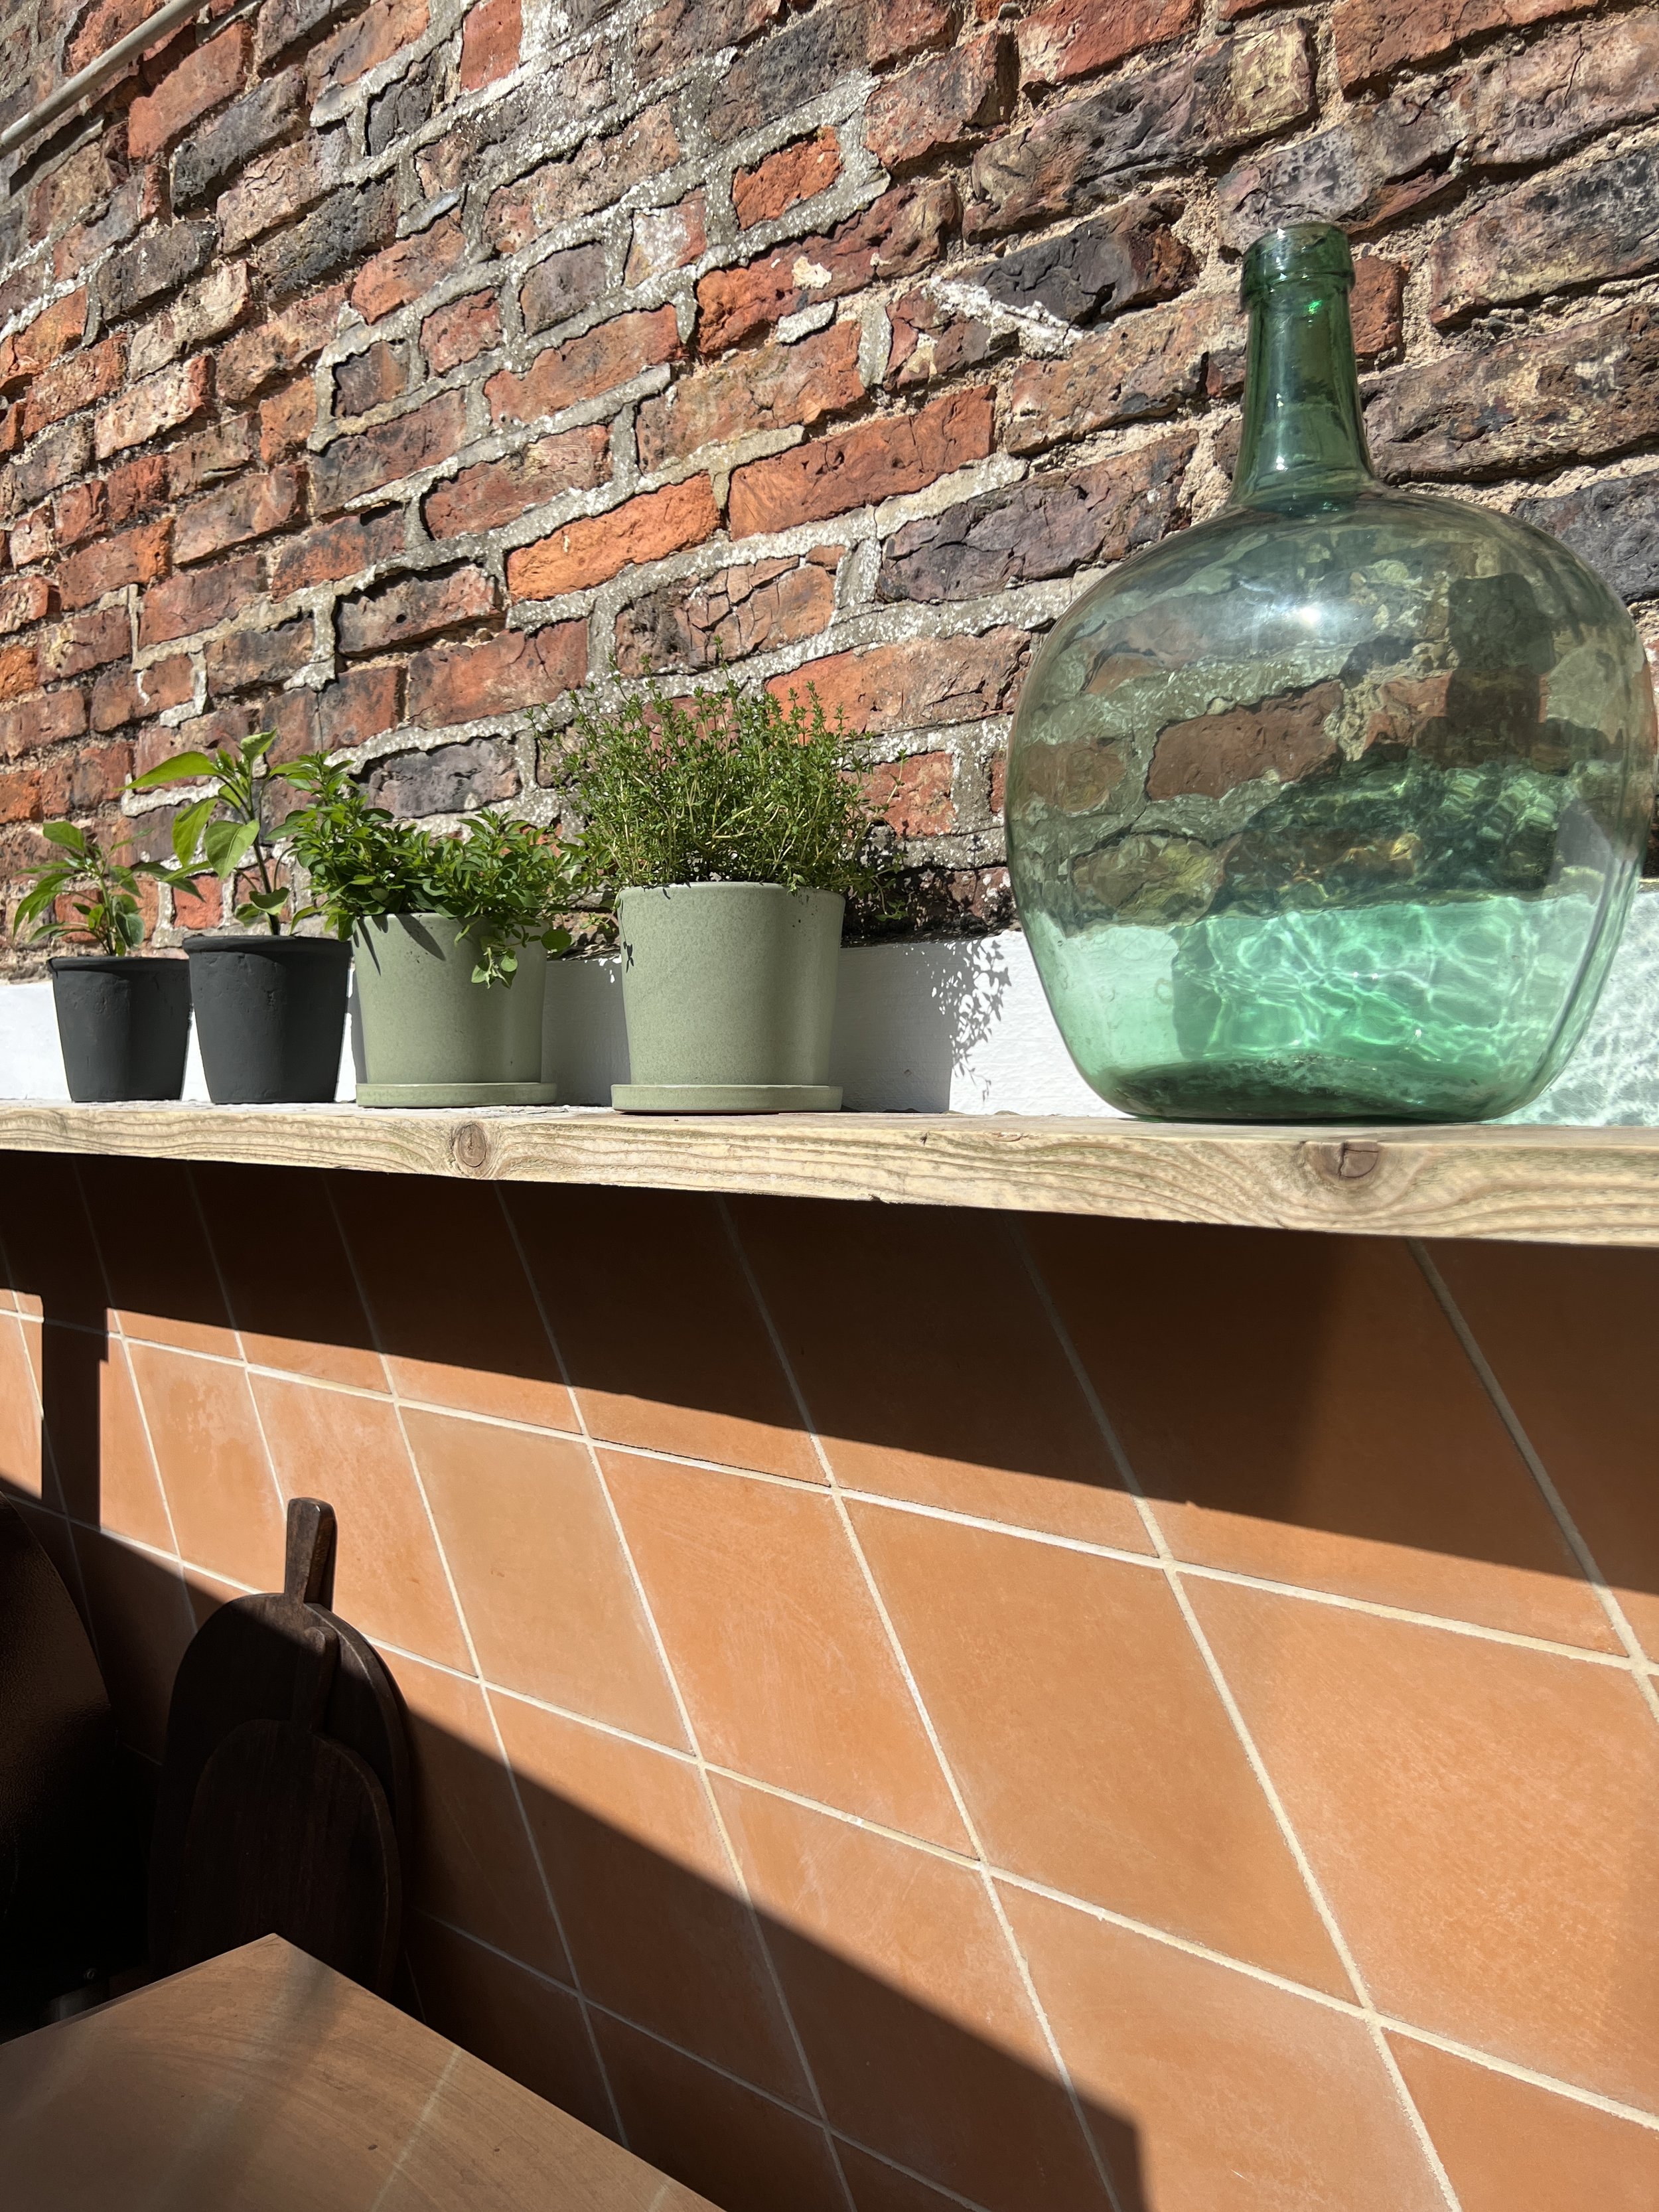
I found a couple of scaffold boards at the back of the garden left over from previous projects and decided to put them to use. The smaller one was cut to size to sit on the top of the tiles - we used metal prongs in the wall so that it floated rather than sat on brackets. Click here to read my blog on how to do this. The longer one was repurposed along the dining area wall - I already had two scaffold brackets so I picked up some more from Amazon to make four in total. Both of these were sanded and oiled with Danish oil. I have been collecting large old glass bottles for ages and along with some garden pots, used the longer shelf to display them as a feature. I added herb pots to the kitchen shelf - both from H&M, black and sage green so that they were handy for cooking. Not that Joe has ever added herbs to anything in his life but we can live in hope.
Painted The Lot
Once it was all in place we painted the entire bench bar the concrete worktop in Sandtex Ultra Smooth Masonry Paint in Brilliant White, including the rendered wall behind. Yes, I know, white isn’t particularly practical but it reflects the light and gives me the whole Ibiza vibe thing I am aiming for. It’s not a massive area so it will take only an hour or so to paint annually.
Made The Rest From Wood
Finally, Mike made two slatted shelves from wood to put into the left hand side below the pizza oven. The base shelf is for logs (important that they don’t touch the ground else they will get wet and useless) and the middle shelf for storage. I added baskets from Homesense which house placemats, table stuff etc which work brilliantly (I uncharacteristically measured the space and went complete with tape measure for the perfect fit). To the right hand side which houses the gas bottle, Mike made a slatted door from timber. All the wood that he used was external grade treated, the same as is used for fences and sheds. Both the shelves and door will naturally weather in time to a silver tone.
Created A Dining Space
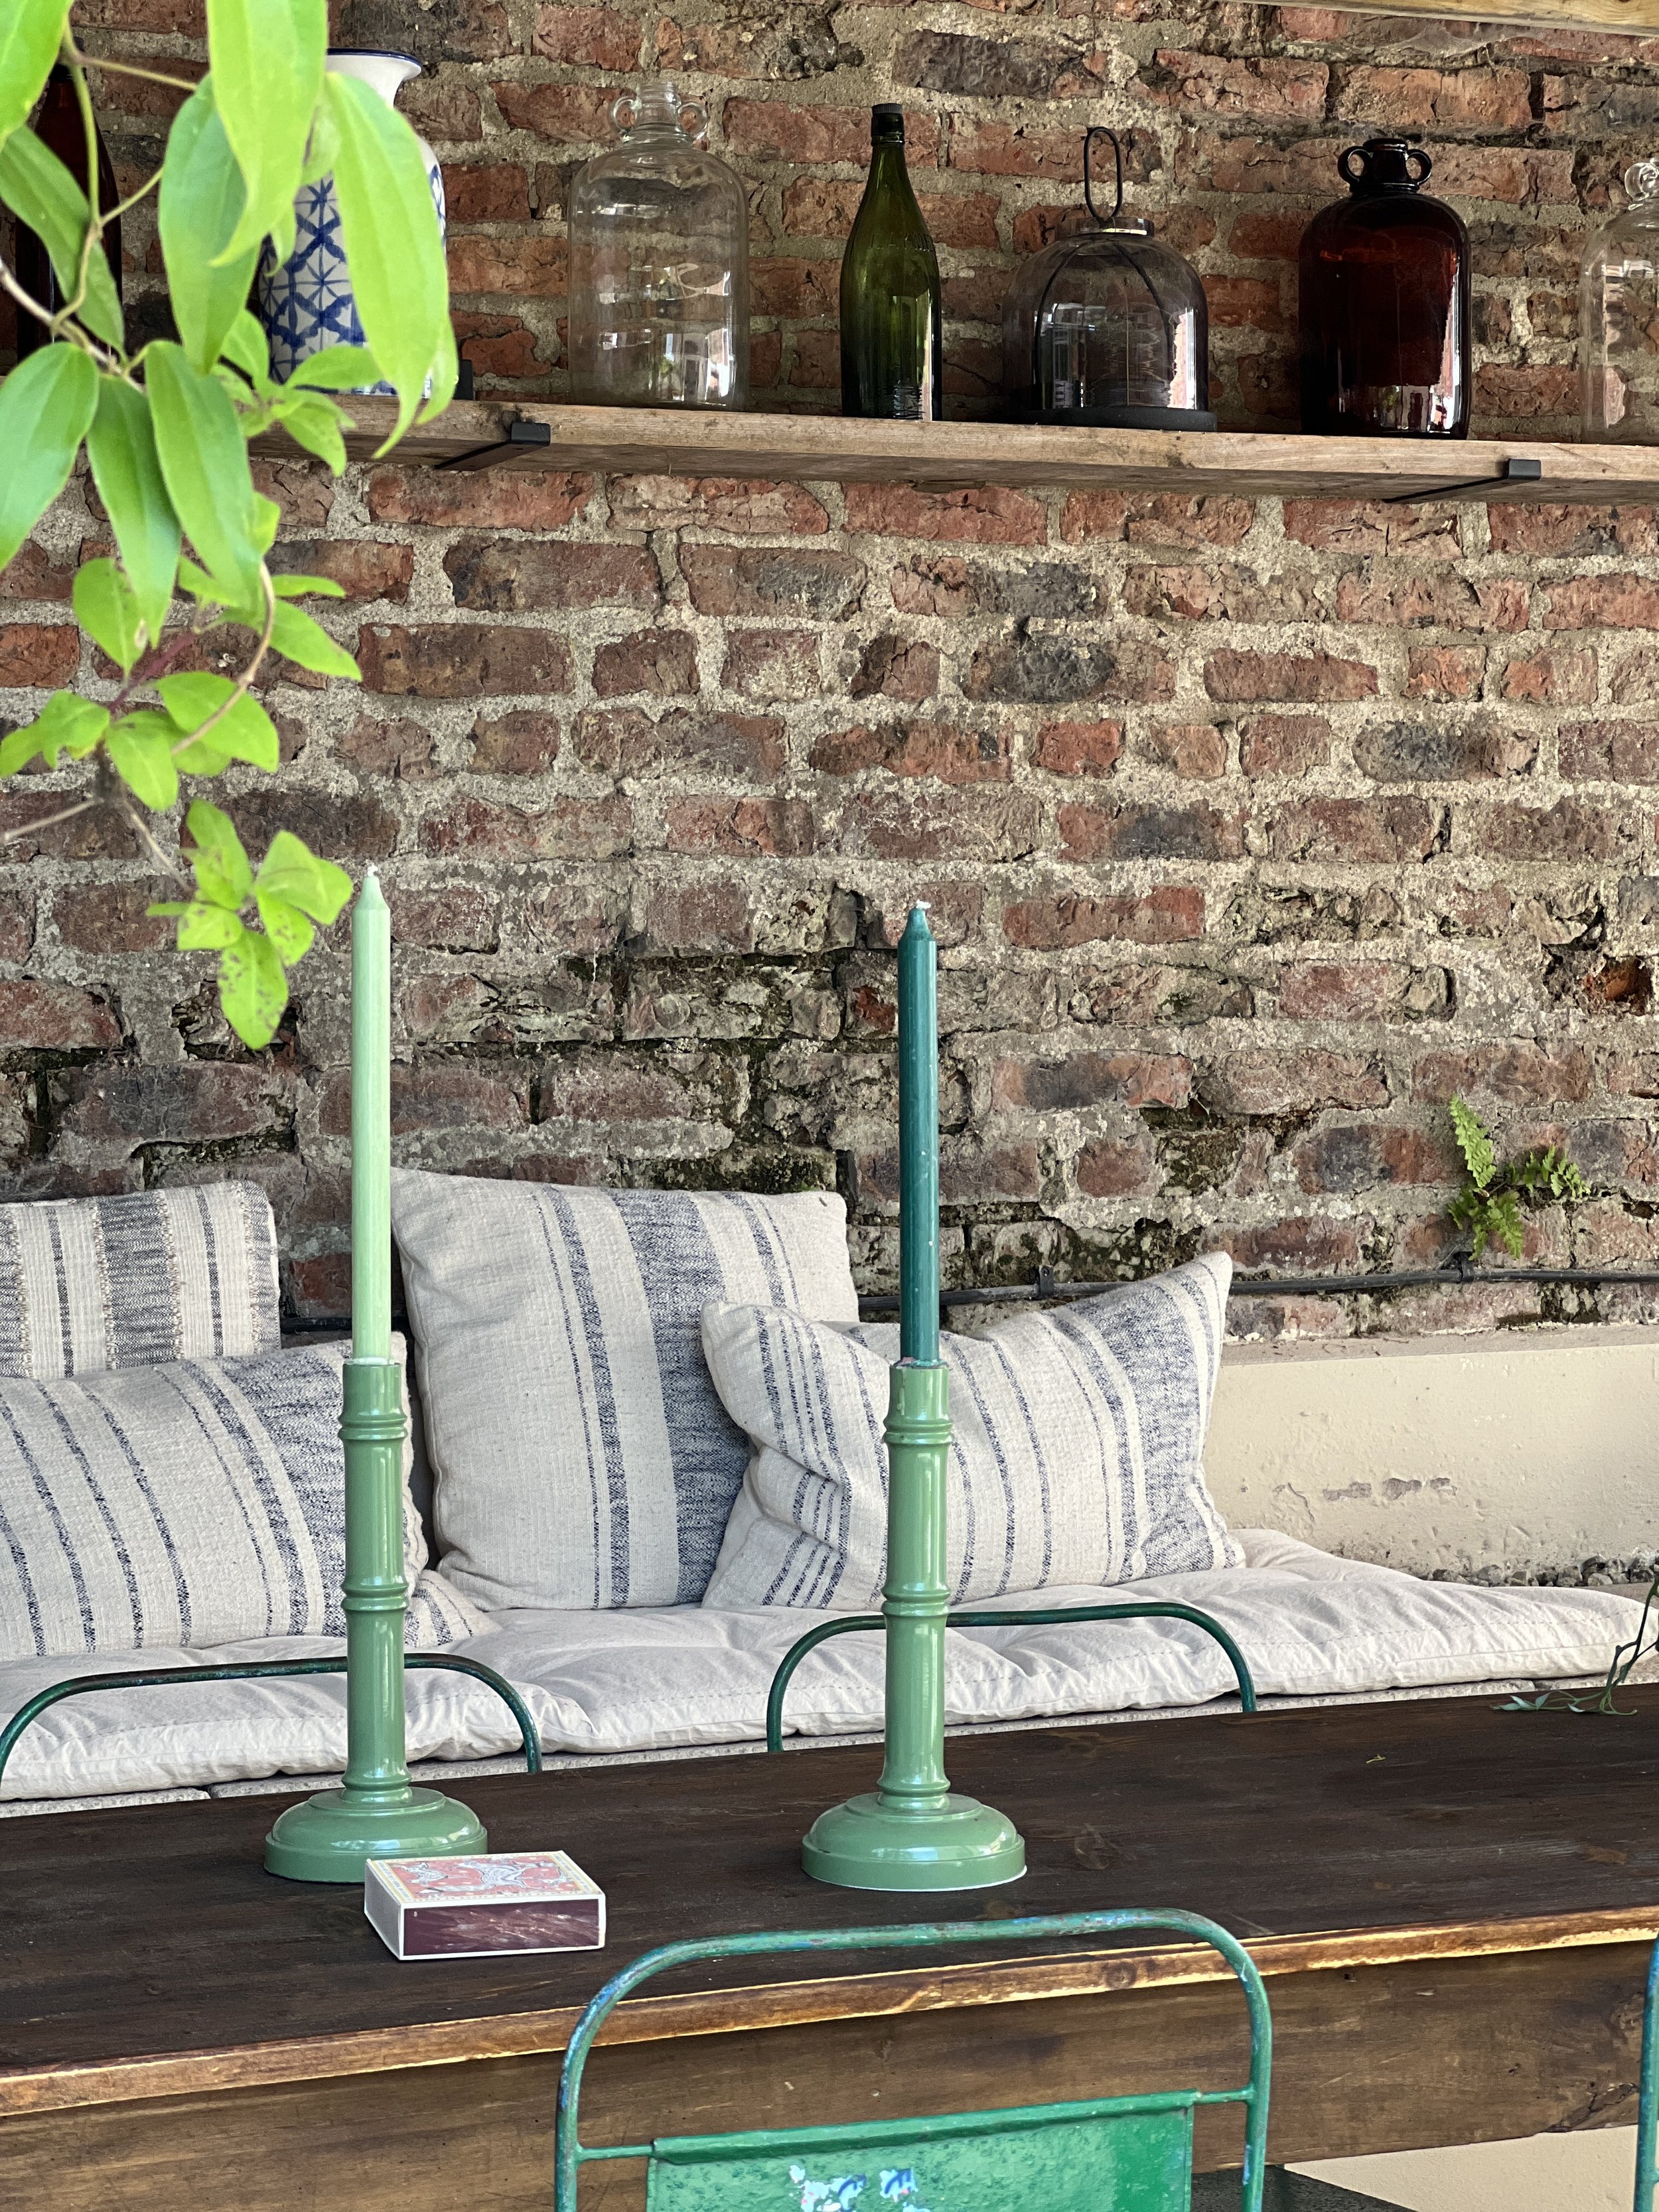
We’d had our outdoor dining table (an IKEA buy) for eight years but it was really quite big for the space. Additionally, we now also had a dining table in the courtyard so we could definitely go with a smaller one. I sold the table and bought a long slim pine table from The French House York with a plan that I’d cover it with a plastic sheeting cloth over the Winter months. I added the worlds most uncomfortable chairs that I purchased from eBay a year ago but which are perfect for outdoor use as they’re metal. I invested in a new jute outdoor rug from La Redoute, some striped square cushions from H&M and a long cream mattress cushion from Zara which fits the bench perfectly. Two portable Fermob lamps from Cloudberry Living add light and I’m in the process of adding wall lights too. Finally, I added two wooden boards to the worktop so that Joe could serve his BBQ and pizza creations in style. Job done.
Adding the outdoor kitchen to the far wall has really pulled the space together and created a really sociable space. The storage means that I don’t have to spend hours trying to find the BBQ tongs in the carnage of our utility room and the baskets are perfect for having all the tableware to hand instead of having to bring it all out. Thanks as always to Mike The Builder for making my building dreams come true when I have no skill whatsoever in this department. Now all I need is for Joe to clean the BBQ regularly. A woman can dream.