
A Quick Upcycle Project: From 80's Mahogany To Pastel Chic
Unless you’ve been on a social media break, if you follow me you’ll know that for the last four weeks, my life has been ruled by the social media project that I run with my friend, Bianca Hall of French For Pineapple, Revamp Restyle Reveal. The project involves ten bloggers updating a room in their homes over the course of a month, with the assistance of sponsors. The concept is to utilise as many DIY skills as you can, to provide inspiration and ideas to those following the project and basically to show that revamping a room isn’t half as scary as it may look to the uninitiated. Sounds good, yes? We’re now in Season 3 and in the previous two projects, I’ve focused my room revamp on pretty standard decor. Living room the first time, bedroom the second. But this time, I decided to go hardcore and revamp the family bathroom.

My first ever successful upcycling project, still going strong.
Having last updated a bathroom in 2004, I’d completely forgotten what an absolutely massive job it was. The room had to be stripped back to basics, four layers of floor removed, cupboards that had been there since the fifties knocked out for extra space. Damp walls, dodgy doors and complete replumbing, it’s been a project that has involved an awful lot of professional tradesmen including builders, a plumber and an electrician. Obviously there are benefits to this situation - my task throughout the month has been to coordinate, attempt to project manage and do the ‘fluffy’ bits which have mostly involved me ordering tiles and hardware and saying ‘wires here’ whilst being covered permanently in a thin layer of dust. I wasn’t feeling like I was doing much.
The old bathroom double cupboard, prior to being demolished to make way for a vanity unit, was full to the brim with ‘stuff’. Old school uniforms, sleepover duvets and clothes that I’d intended to pass down from Max to Leo which I’d a) forgotten about and b) Leo wouldn’t touch with a barge pole. I was ruthless in my downsizing of this cupboard (basically freecycled, charity shopped and tipped the majority of it), leaving myself only with acceptable linen to rehouse. But where to put it? I decided that this was an excellent opportunity create an upcycled linen cupboard that would sit perfectly outside the bathroom door, enabling me to make a creative contribution my bathroom rather than just coming up with a moodboard and watching the professionals take the hit. Not only would it be perfect for duvet covers and pillow cases, but it would also be able to store towels somewhere other than the floor which is where my children generally like to leave them. I measured up the space and there was plenty of room so I set off to my favourite second hand furniture shop, the Community Furniture Store in York, to find something suitable.
The result of my endeavours was so well received by the Instagram public that I decided to do a ‘How To’. This blog post comes with a warning, however - I’m a VERY slapdash upcycler and my decorating methods would rule me out of being head hunted for any DIY programme ever broadcast, either now or in the future, unless they were specifically hunting for presenters who are very good at fucking things up. So what did I find at the Warehouse Of Wondrous Tat and how did I transform it from shite to chic? Read at your peril.
Picked A Winner
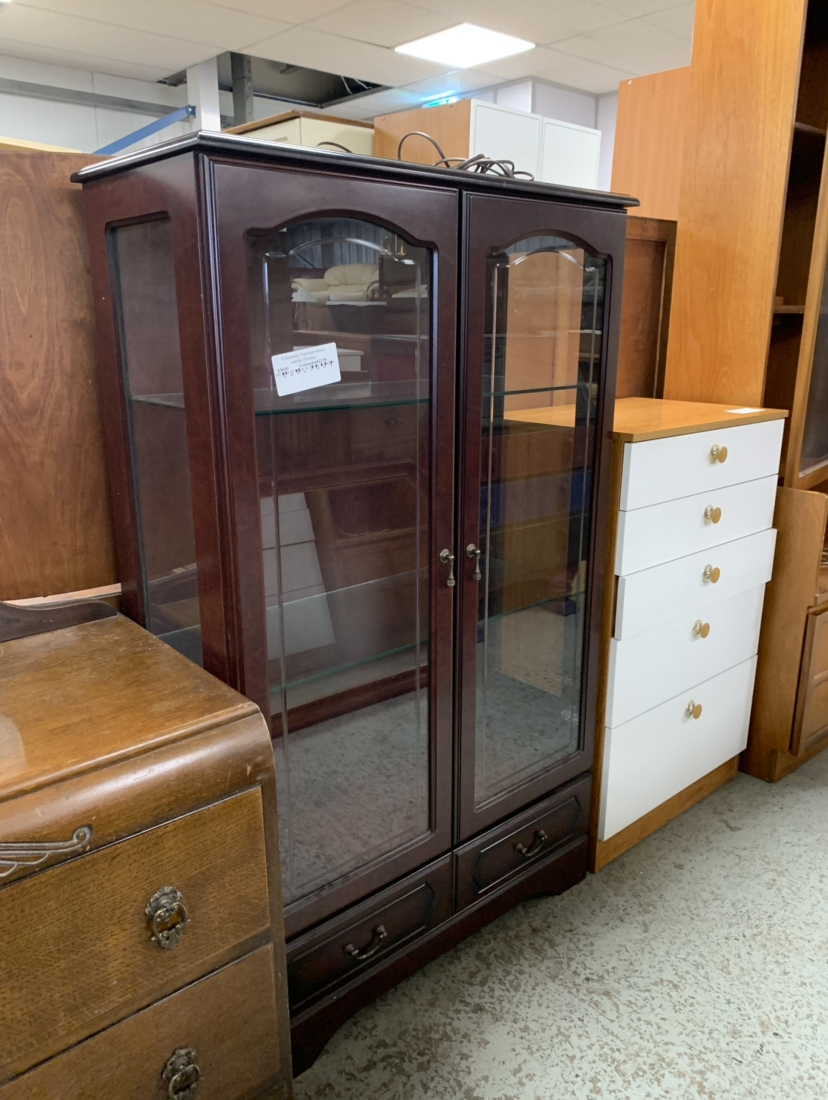
The Community Furniture Store never fails to disappoint. There were loads of cupboards to pick from, but there was only one that fitted the bill. A 1980’s light up display cabinet, there was certainly no dovetailing or hand turned joints involved in the production process - it was a mahogany veneered, glass doored, chip boarded miracle of a cupboard. I could see no one else looking at it, mostly because it was absolutely horrible.
Marked £30, I measured it up and it was the perfect fit for the space so I handed over the cash and booked delivery for the following week (they deliver free, btw, if you are local - how good is that?). I had a vision and I was prepared to work (sort of) to bring that vision to life. Bring it on.

Did A POA (Plan Of Action)
The cupboard was delivered whilst I was in Frankfurt and Mike who was building the bathroom took delivery of it in my absence. It was all he could do not to immediately throw it on the skip, but I knew that it had potential. Somewhere. I decided that the only way to go was pink. I’m a massive fan of pink but am always loathe to put it on the walls for fear that I will hate it after five minutes - I’ve done this before so it’s a proven fact. But accessories and upcycling are a different matter - moveable, changeable and if all goes wrong, skippable.
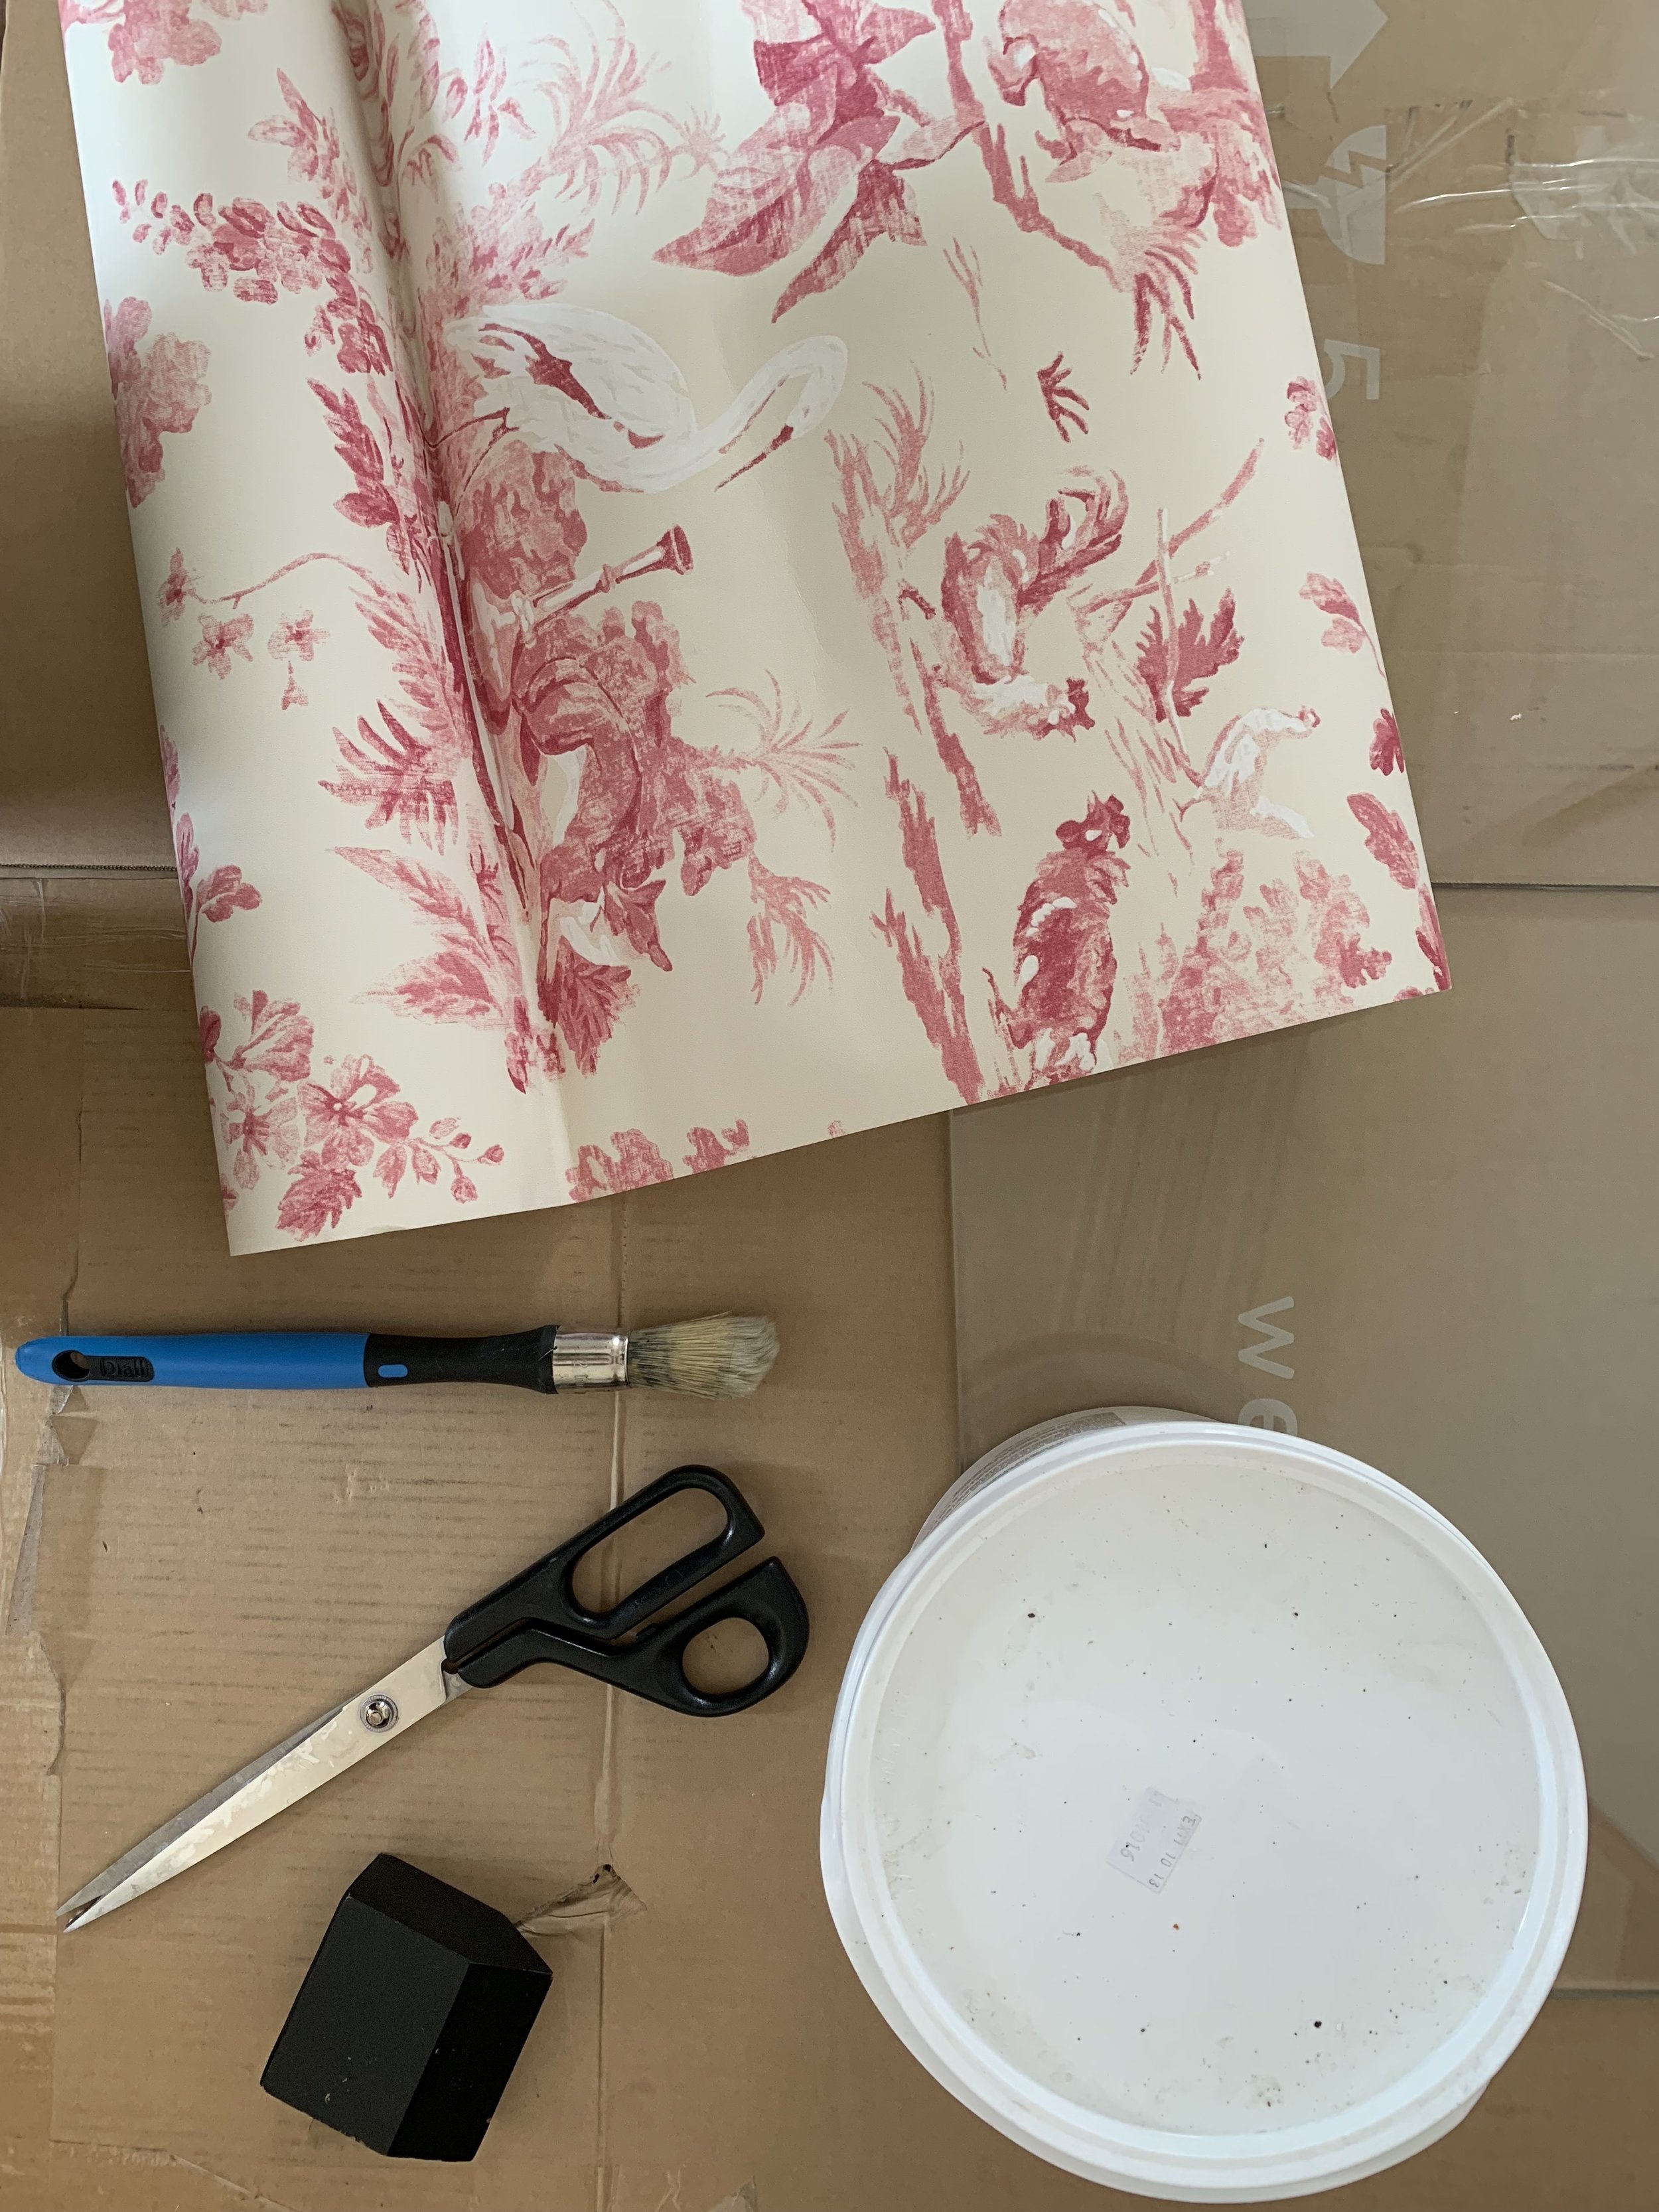
I chose French Rose by Sanderson, the perfect shade of pink that I’d previously used on my front door with much success. Wallpaper wise, I wanted to keep it tonal so I chose a paper that worked well with the colour called Aesops Fables, a modern twist on the traditional Toile De Jouy. I took the handles off the unit and removed the plug in bulb section that lit it up - there wasn’t going to be any need to light up the duvet covers. I placed the cupboard on an old tablecloth, equipped myself with a paintbrush and set to work.

Was Predictably Slapdash
My preparation consisted of wiping the unit with a baby wipe. I didn’t sand it, I went straight in and slapped on the first coat to get it done. At this point, I debated whether to use masking tape so that I didn’t paint on the windows but I remembered a piece of advice given to me by decorator extraordinaire, Bianca Hall. Bianca’s tip was to ignore the wood/glass boundary and just paint away, not worrying if you got paint on the glass. Once dry, you use a sharp scraper and a dry paintbrush to scrape off and brush away.
I decided I’d try this as it seemed like a much easier option than masking it all off, a job of boring hell. Joe and the kids came in to look whilst I was undertaking the second coat and immediately commented on the paint splattered doors. I assured them that Bianca had said it was ‘easy to scrape off’ and that it was all under control. I did three coats in total, leaving approximately an hour between each.

Scraped For What Seemed Like EVER
Sunday dawned so I went in with the scraper. Unfortunately, I discovered that I didn’t actually own a scraper so a flat headed screw driver seemed like the best option. I soon realised that the ‘scrape and brush’ method had it downsides, namely that I seemed to be scraping a fair amount of the actual wood back as well as the window.
It took an hour or so to remove the majority of the paint from the glass but there still seemed to be residue remaining, so I decided a Brillo pad was a good option. Being a product of the 1980’s, the cabinet had suitably toughened glass that laughed in the face of the wire wool, not leaving any scratches as I scrubbed to removed the last of the paint. It was starting to look pretty good, even if I say so myself. The scrape and brush method was winning.

Used The Rock N Roll Bride Touch Up Method
This is a less pornographic procedure than it sounds. There were plenty of areas where I’d over scraped and there were spots of wood showing through the paint. Kat Williams, magazine editor and all round clever person had suggested using a make up brush for this sort of paintwork so I found an abandoned Real Techniques eyeshadow brush belonging to Ella (her make up collection equates in money to at least five times as much as mine) and set to work.
It worked BRILLIANTLY and took no time at all for the wood spots to be gone for good. Excellent tip indeed.
Used A Controversial Wallpaper Technique
So the two shelves were thick glass but I wanted to reflect the wallpaper I was intending to use on the back of the cabinet to divide the inside space. I decided to wallpaper the shelves. Yes, this does sound a little odd and I have to admit that I wasn’t sure it was going to work. In Season 2 of Revamp Restyle Reveal, I had wallpapered my IKEA wardrobes, much to the horror of many of my followers, but it worked absolutely brilliantly and almost a year down the line, it’s still holding strong. Spurred on by this knowledge, I wrapped the wallpaper around the shelf so that one long edge was covered.
I used ready pasted wallpaper mix from B&Q and pasted one side first using a paintbrush, pasting the shelf rather than the wallpaper, one side at a time. I used wallpaper scissors (bought when I did my massive wardrobe job last year) to trim if all off.
I would massively recommend investing in a pair of these - they’re not expensive but they’re very handy. This week, in fact, I used them to cut blossom off a tree for a photo shoot. I do love a multi tasking implement. The shelf job took literally about two minutes and looked perfect. I left it to dry and it didn't even bubble. Brilliant, even if I say so myself.

Made It Look Pretty
It was all looking beautifully pink but the back panel was still distressingly mahogany. I cut the wallpaper to size and pasted it on - again, I pasted the back of the cupboard rather than the wallpaper and then adjusted it. Once on, I trimmed using my wallpaper scissors and left to dry. If you’ve never tried wallpapering before, this sort of project is absolutely the best place to start.
My first ever wallpapering attempt involved a £5 sideboard that I picked up on Gumtree and was an excellent starting point. I wallpapered the back and the sides and it still survives, looking good, in my hallway, filled with my vast collection of magazines. Don’t ever be hesitant about giving it a bash - it’s all trial and error and it’s far easier than you would expect.
I’ve written a blog about wallpapering after I wallpapered my dining room myself with little or no experience - you can read it here.

Finished It Off
So the cabinet was pretty much finished but it still needed some finishing touches, namely some decent knobs. I’d already ditched the ones that were on the cabinet when I bought it and decided that at least as a temporary measure, I’d remove the ones from my wardrobe doors as they matched nicely. In addition, I went on to the Anthropologie website and ordered some brass knobs as a more longer term solution.
If you have never checked out the Anthropologie sale, I would absolutely suggest you do. The knobs I ordered were reduced from £16 each to £4.50 and were perfect for the cupboard. In fact, the wardrobe knobs that I temporarily put on had also been Anthropologie sale bargains for a similar price. They’re far more unique and interesting then popping down your local hardware store so don’t be put off by thinking they are out of price range. The drawer at the base of the cabinet had previously had a handle with two holes in, so I drilled a small hole centrally for the new knob. Job done.
So that was it. Mahogany 1980’s light up display cabinet transformed into a pastel pink chic linen cupboard, perfect for residing outside the bathroom and extremely handy storage. I received hundreds of messages about this upcycle which is why I decided to write about how I did it. It’s not difficult, it didn’t take long and the best thing about it is that it created something useable from something that no one else wanted. 1980’s furniture generally is a no go area - it’s not solid wood vintage, it’s not pretty and it’s super dated - and there’s loads of us lumbered with some seriously out of date pieces. With a bit of paint and imagination you can make it useable again. And the biggest plus is that you’re saving it from landfill and recycling an unloved piece of furniture, so you can actually feel pretty smug that you’re helping to save the planet whilst rehoming at the same time. Even though Mike the builder still wants to throw it into the skip each time he passes it. Rude. Just rude.
