Adventures In Decorating: How To Sand A Floor
I've always loved a natural wooden floor. There's something about original boards in old houses that just works. I think it's because the history of the house is exposed in the bare wood - who knows who has walked these floors? Or what has happened within the walls? Actually, let's not think about that one too hard. I've heard that the Georgians were quite a frisky lot.

Our house as it was in the 1940's when it was still a working farm. The room I'm revamping is in the original part of the house, the bottom right hand window.
My house was built in 1759 which sometimes I find hard to get my head around. The knowledge that the bricks were laid 258 years ago by people who had no idea that hundreds of years later we would be hoisting up Sky dishes, drilling in cable lines and parking our cars in the stables. The cellar, which would have been the Georgian equivalent of the fridge, is now crammed full of discarded interior items awaiting rediscovery and three boxes of Christmas decorations. There are pro's and con's to living in an old house. High ceilings, original features, sash windows. On the flip side, you've got woodworm, draughts and high maintenance costs. You take the rough with the smooth when you buy a period home.
When my sister moved into her last house, a 1930's detached property in Caversham, it was a probate sale and hadn't been touched for about 50 years. The electrics all needed rewiring and there was a hideous patterned carpet throughout. It had a huge hallway, almost like a room in itself, and the first weekend she moved in, I went over for a quick glass of wine. Two bottles of wine and a packet of Walkers Chicken Sensations later, we decided that the carpet had to go. Out came the screw driver, up came the Axminster circa 1958 and what was revealed? Perfect parquet. Across almost the entire ground floor. The dream.

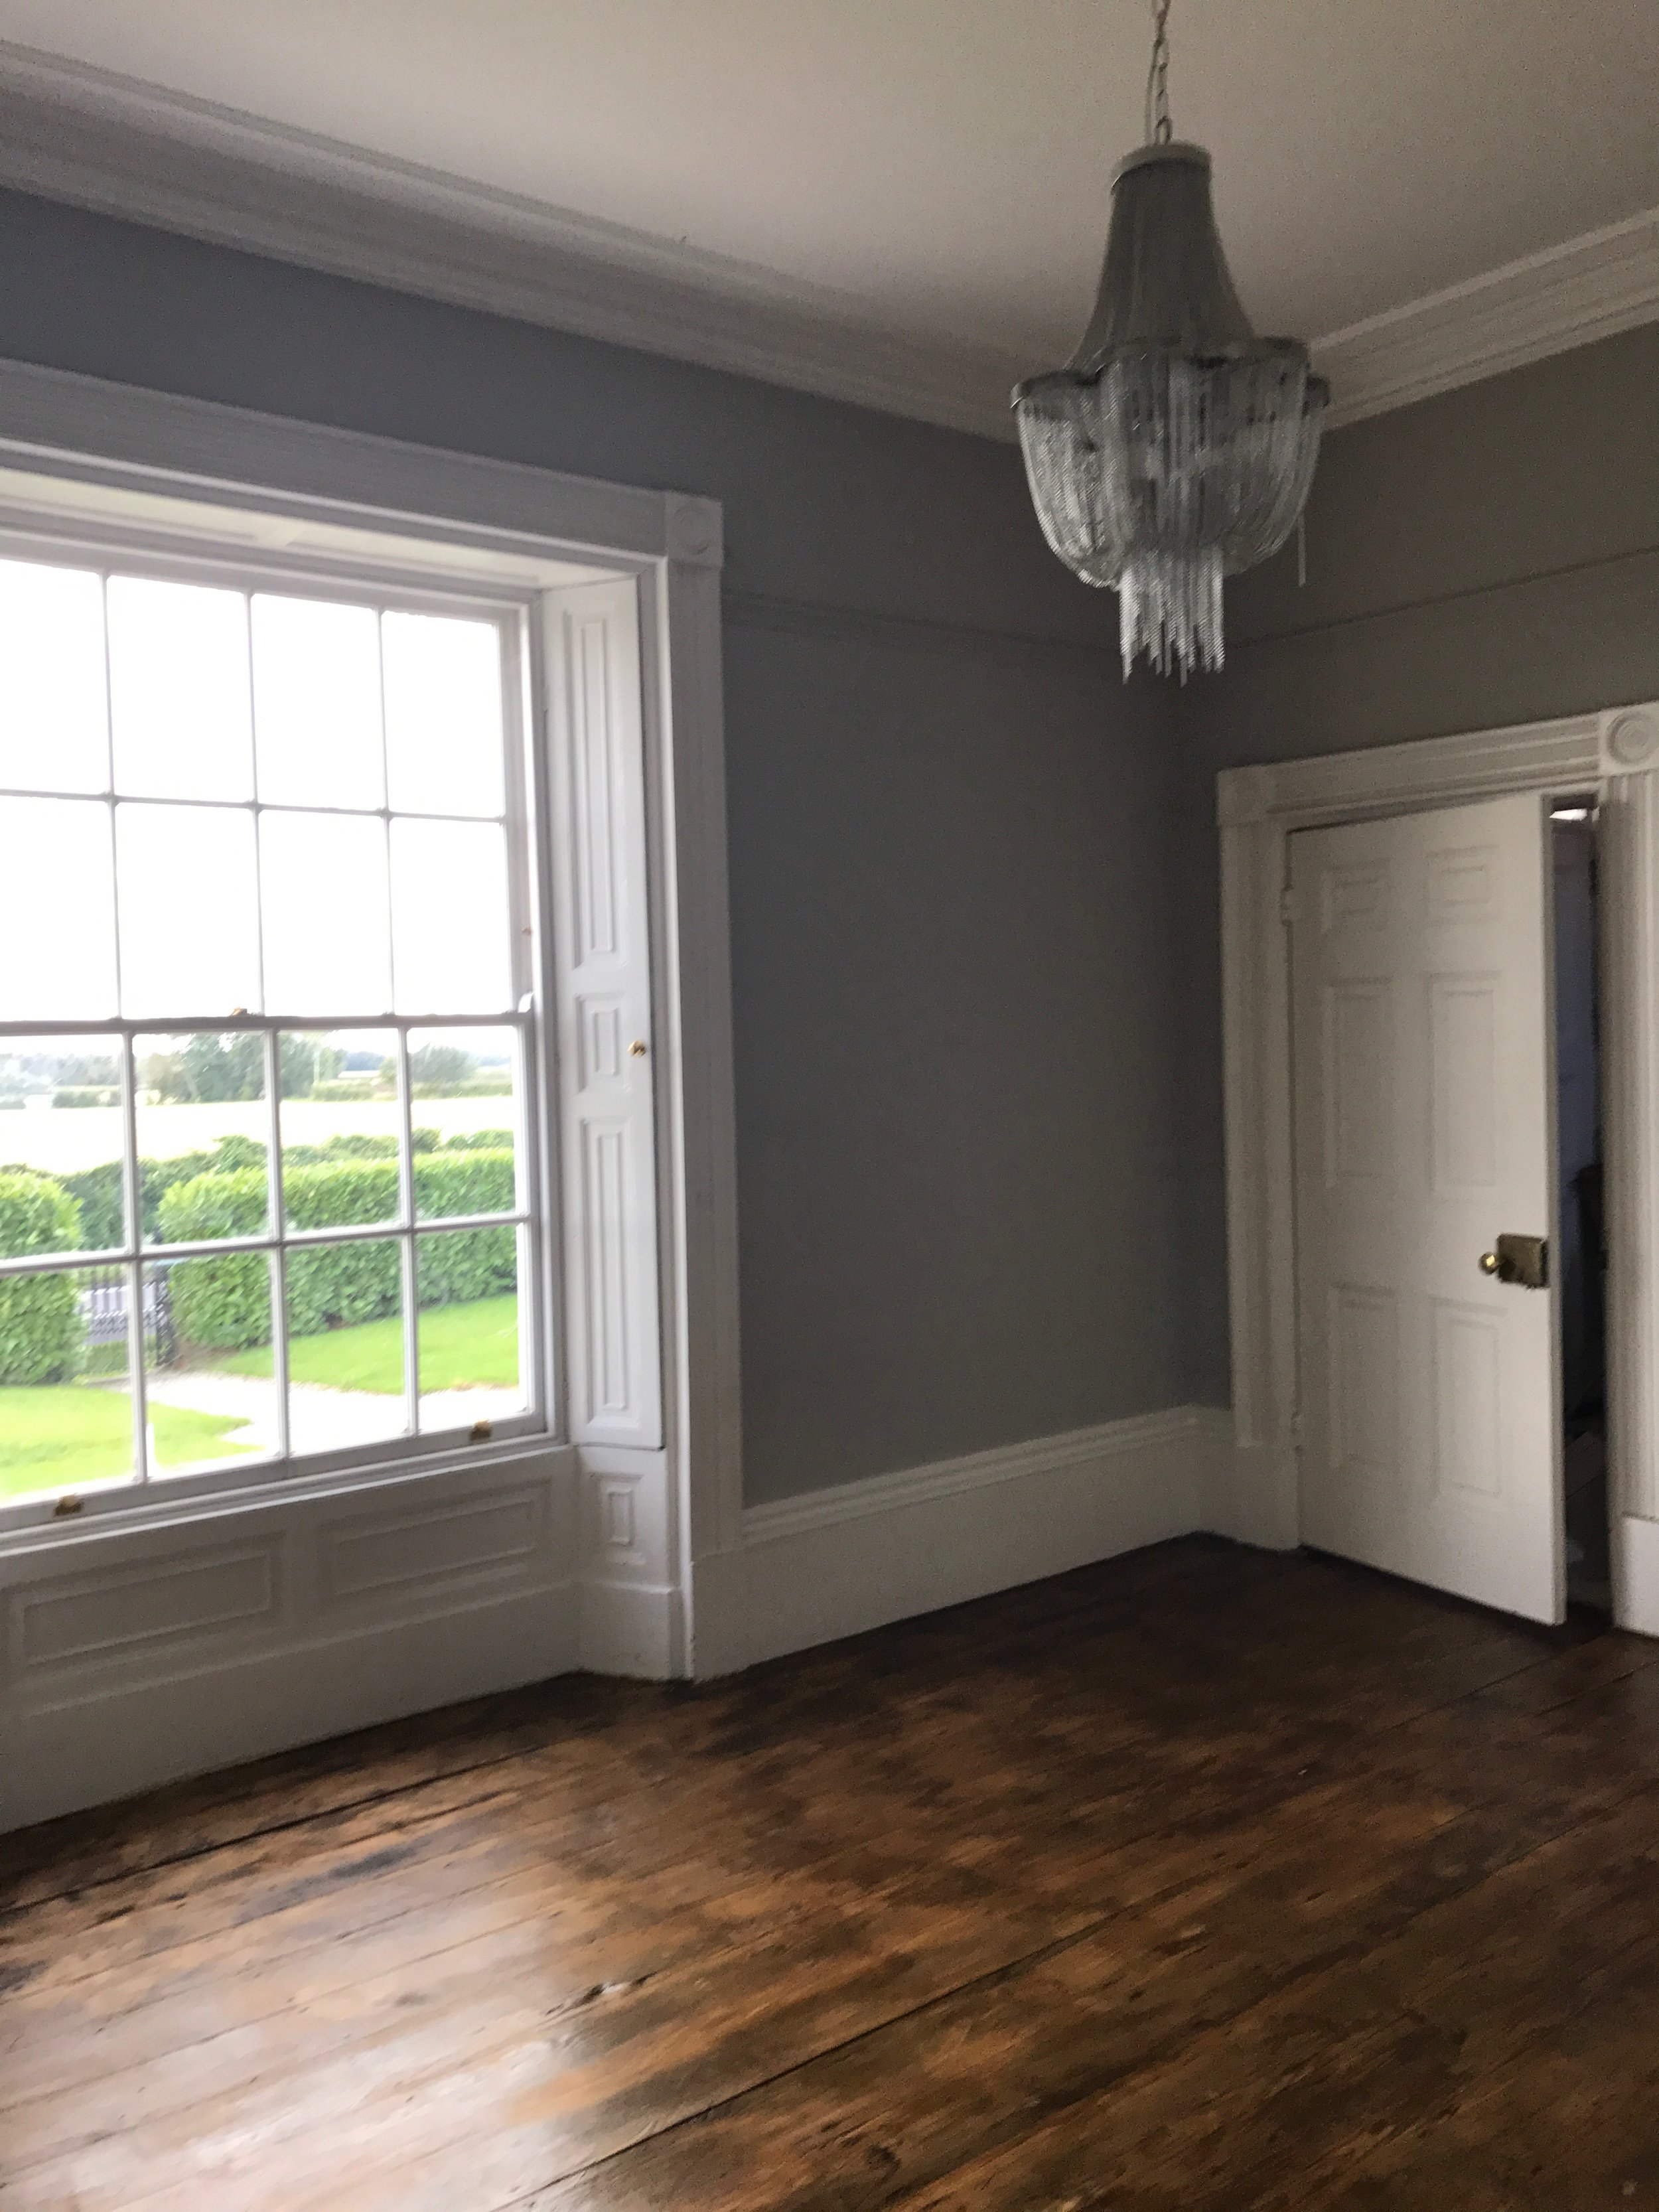
How I'm hoping my room will look at the end of the Revamp Restyle Reveal project. Fingers crossed.
Our house had been renovated by a property developer when we moved into it two years ago. The living room and dining room both had modern solid wood walnut flooring that gave as good an impression as possible of being authentic. The hallway had white marble tiling which although sounds impractical, is actually quite easy to look after - you can see the tumbleweed immediately as there are no dark corners.
The sitting room had cream carpet. Yes, cream carpet. I had three children and a dog barely out of puppyhood. Within a week of moving in, Buddy had christened the carpet (in both ways) and therefore created a homing device for himself and all dogs who then visited our house. It was like a urinal pilgrimage to canine Mecca. It was stained beyond repair so the only thing that I could do was to throw rugs over it. Thank god for texturing.
So when Bianca Hall, Oliver Thomas and I launched Revamp Restyle Reveal at the beginning of this month, the first thing I did was pull up the carpet. I can honestly say it was the most liberating thing that I have done in years. I had no idea really of what was underneath, but after two years of walking on the equivalent of a dog toilet, I didn't really care. Luckily for me (and my bank balance) the original Georgian boards were intact. Not everyone in the family was as overwhelmed with happiness as I was. Leo arrived home from school and promptly burst into tears and announced he hated wooden floors. However, I was undeterred and immediately started planning how I could recover them as part of my Revamp Restyle Reveal room project.
I knew that the easy route would be to hire someone in to do it. However, one of the main points of the project is to actively promote DIY in our own homes. All three of us are committed DIY obsessives - Bianca has been nominated in the DIY & Home category this year in the Amara IBA's and Oliver was a finalist in the Great Interior Design Challenge, a creative hotbed if ever there was one. Plus, although I knew that it would be a big task, I also knew that I would get loads of satisfaction from doing it myself.
So how did I go about it? This is what I did.
Prepped Up
Anyone who has ever lifted a carpet will know that upon removal you are presented with basically an instrument of torture for bare feet. So the first job that I had to do was to pull up all the nails and staples. Joe's toolbox would win no awards (insert laughing face emoji). It's a random collection of screws, tiny allen keys left over from IKEA furniture, cavity wall rawel plugs from our first home in 1999 and countless washers. So when I bravely entered the cellar to collect it (home of many, many large spiders), I knew that I wouldn't be in luck. And indeed, I wasn't.

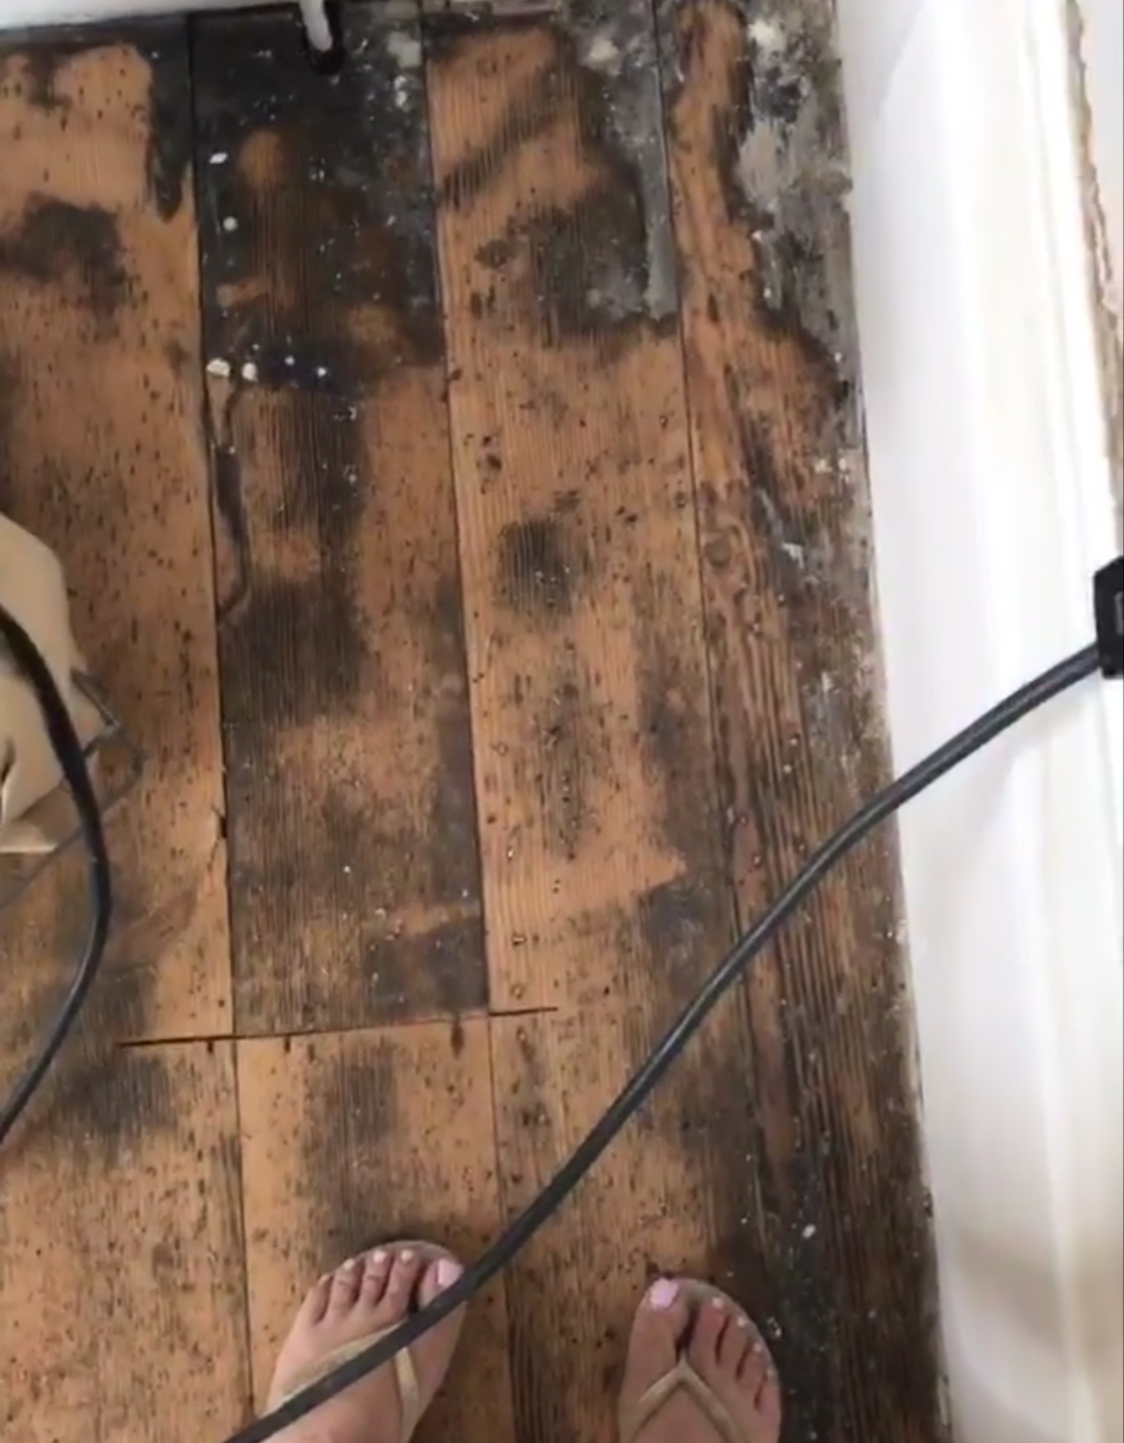
What I was dealing with. The top right hand word on this photography is a good summary, quite frankly.

My toolkit.

Part of the floor was stained and part not.
The obvious tool was a pair of pliers but the toolbox was bare so I had to improvise. Which is why my removal kit ultimately comprised of a pair of rusty secateurs, a screw driver and a pair of scissors. It took three hours to remove all of the carpet nails and staples, but it was important to do so as I'd been told that any obstruction on the floor would cause the sander to malfunction. Little did I know at this point how correct that was. The floor had a lighter square in the middle which was where a carpet would have been laid, and a black tar stained surround. I'd already been told that the black was really difficult to remove, so I knew it was going to be a job and a half. I removed everything from the room so it didn't get submerged in dust.
Hired All The Gear
I found a local hire company by Googling. I always like to use local companies, partly for the small business support but mostly because I am inherently lazy when it comes to driving. The price for 24 hours rental of a sander plus a corner sander was £46 plus VAT but that didn't include the stuff that you needed to do the job. Bear that in mind when you are quoted as it's not immediately clear. They advised that the total including accessories would be approximately £70-£80.

Two machines of hell.

A small quantity of the huge amount of sand paper I got through.

Buddy and I at work, York's answer to Ashleigh and Pudsey.
The hire company was on a large, hardcore industrial estate and I could literally see their eyes moving upwards and their heads shaking as I parked in my white 4x4 BMW wearing a pair of Havaianas to collect my machinery. I could almost hear them saying 'here's a blonde, inappropriately dressed, typical middle class woman who has no idea what she's doing'. They gave me instruction on how to use it and it all seemed fairly simple. In addition to the hire, they gave me a selection of sanding paper, dust bags and a face mask. There were three types of sanding paper: 40 which was rough sanding (suitable for my floor), 80 for medium sanding and 120 for light sanding (used for taking off varnish). You attached the sheets on to the roller which was quite fiddly and involved the use of a screwdriver but was easy enough. The dust bags attached to a tube with a rubber band. How hard could this be?
Got Started
One thing that I hadn't anticipated was that it weighed a fucking tonne. They'd loaded it in for me at the shop, but I had to unload it myself at the other end and I nearly ruptured a hernia. Even the corner sander was like carrying a rock. Anyway, I managed it and got the sander into position, ready to start. I switched it on and was almost thrown across the room. It leads itself automatically, so I had to really hold on to it to stop it from flying off. I went up and down the boards, pulling it forward and backwards. In my mind, I had imagined that it would be a bit like hoovering. I would sand, it would take off the top layer and within an hour it would all be looking as good as it did when it was laid in 1759. Unfortunately, this could not have been further from reality. It immediately became apparent that the black stain was so ingrained that it was going to take more than a quick hoover to get it off.
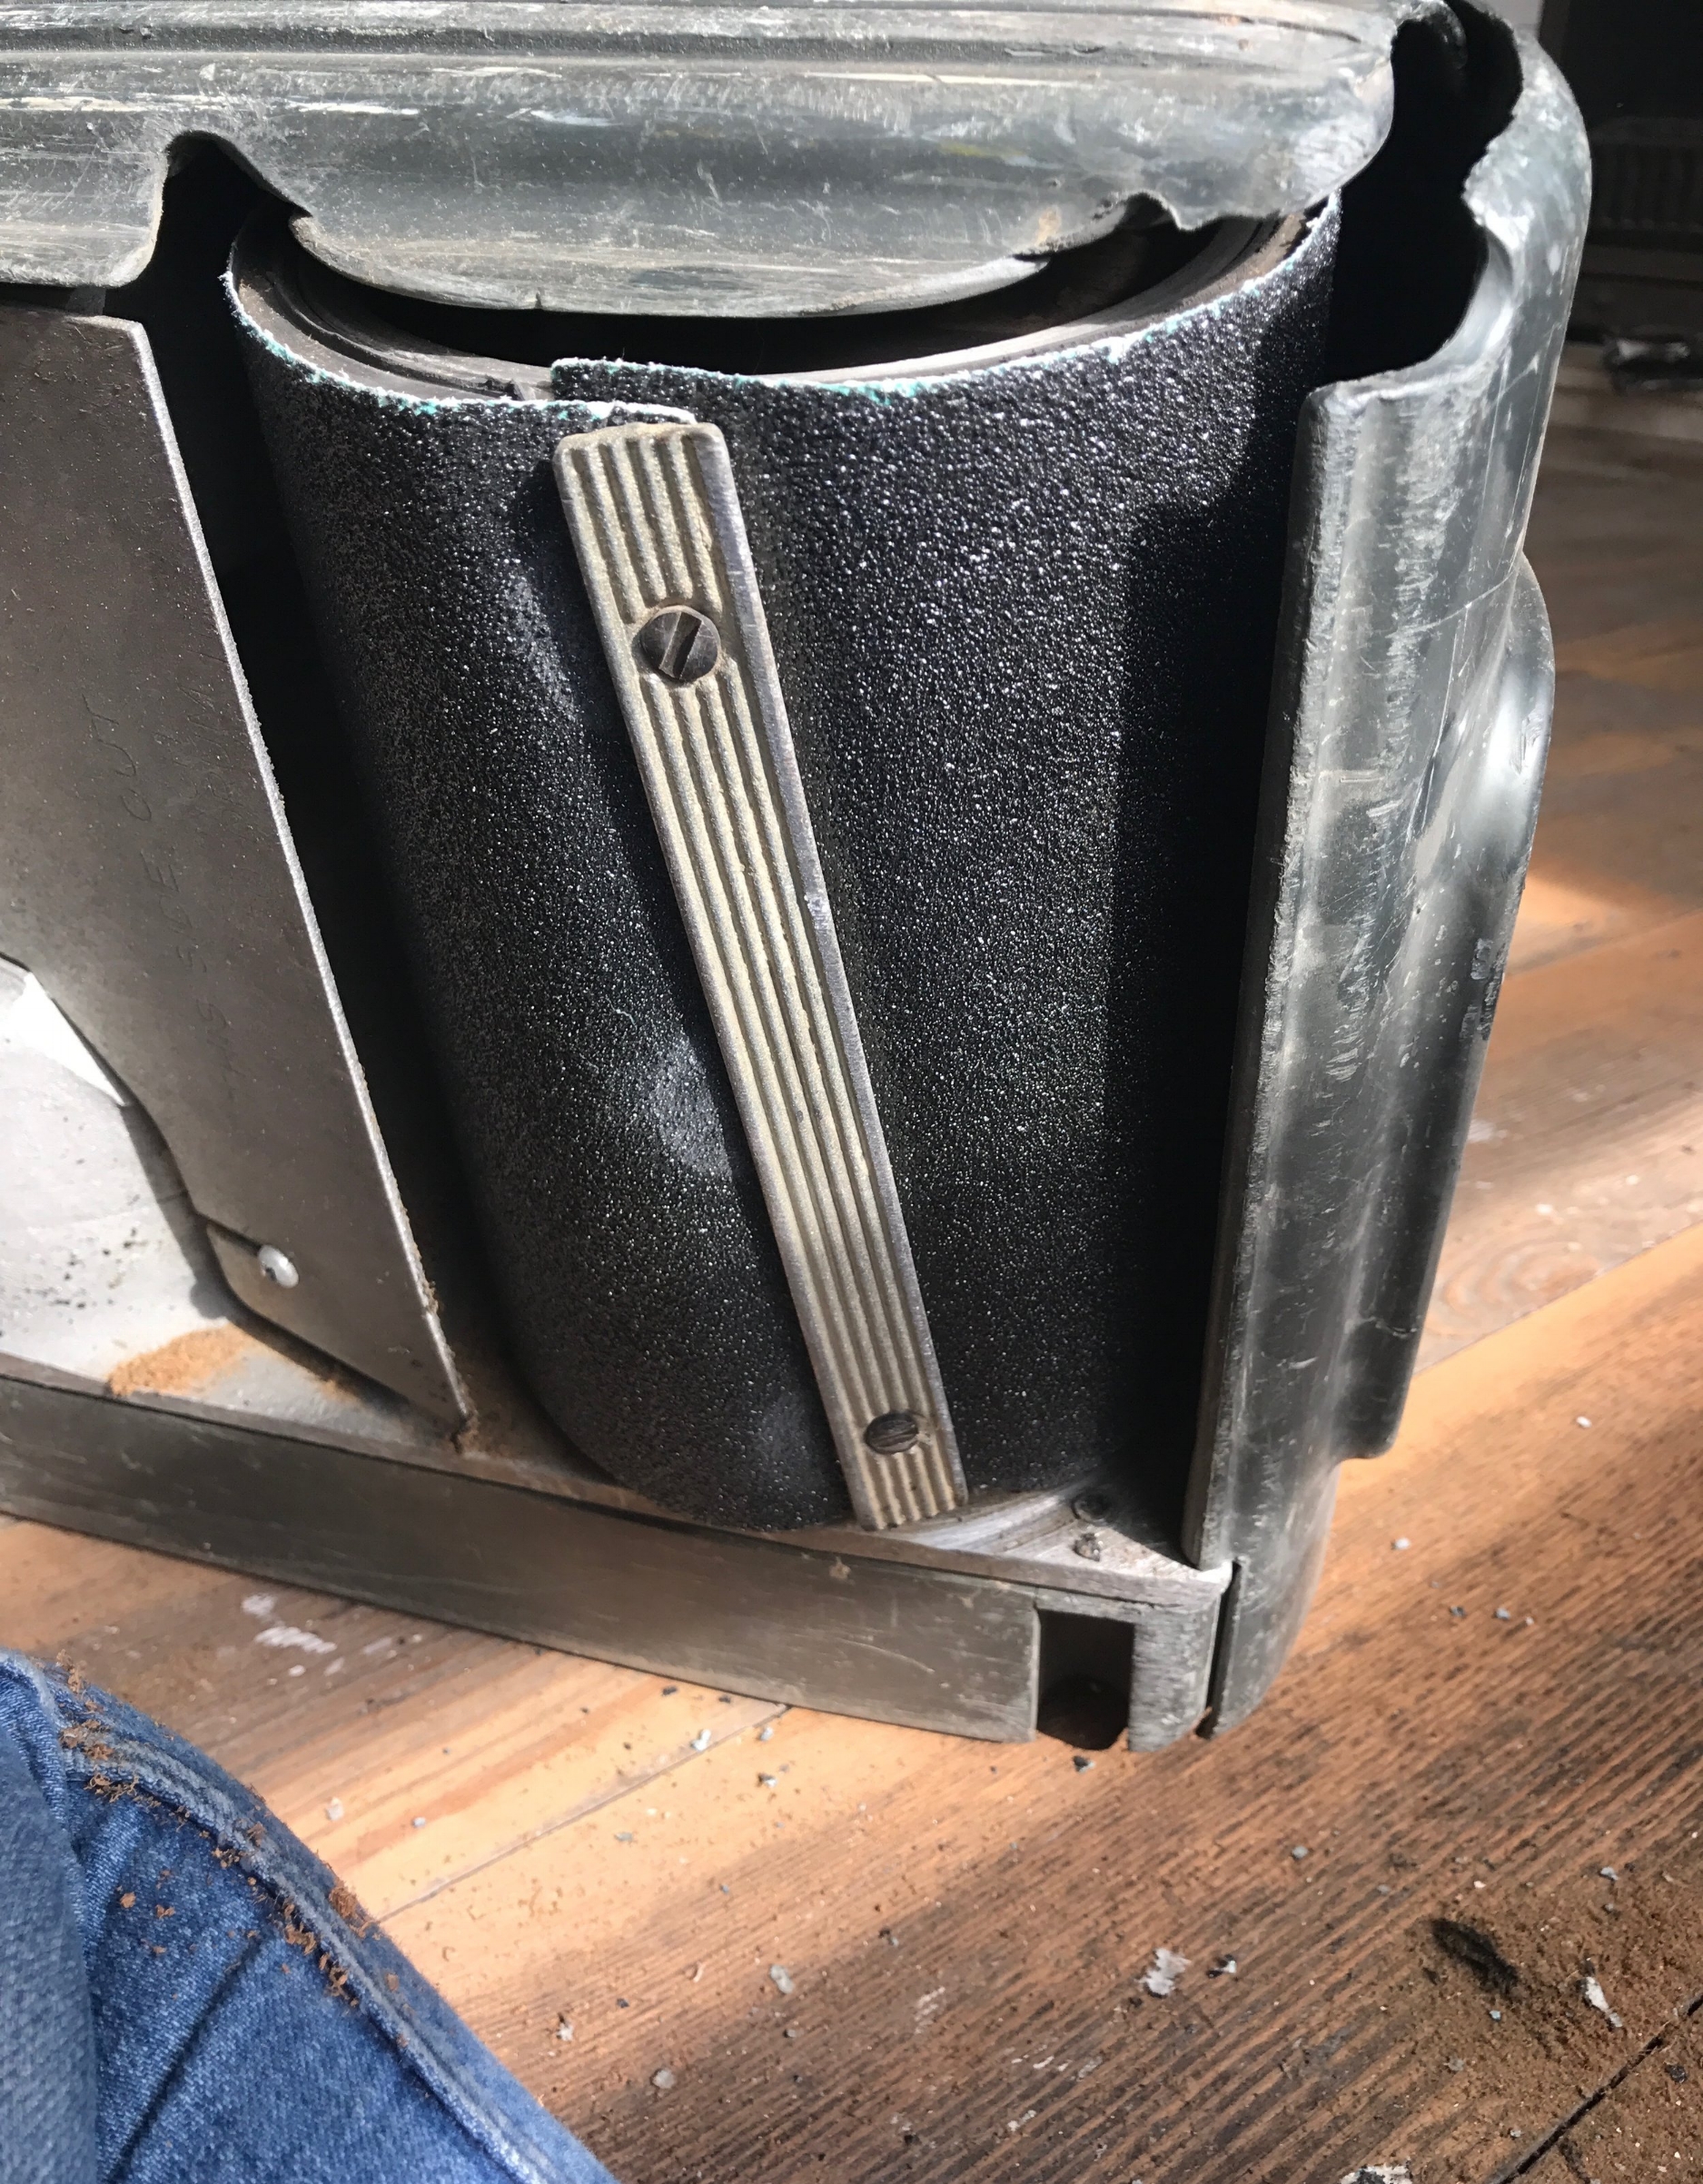
Attaching the sandpaper to the roller.

After the sand paper had exploded from the roller.

Sand paper graveyard.
In addition to this, the sand paper belt around the roller kept exploding for no apparent reason. After the fourth time of this happening, I decided enough was enough and rang the hire company who immediately accused me of not putting the sand paper on the roller correctly. I told him that I bloody well was doing it correctly at which point he audibly sighed and said, 'I'm not pointing any fingers, love'. At which point, I knew that if he had've been in the room, I would actually have hit him. Anyway, he announced that he was coming out to see what was going wrong. When he arrived, he replaced the sand paper on the belt and then tested it to see if it blew. Unfortunately, it was then that I noticed that he was rolling it forward then tilting it upwards to bring it backward, and not rolling backwards and forwards as I had been doing. I was forced to admit that I had been doing it wrong, which to be fair he took with good grace. He left me to it, looking superciliously smug as he walked out the door.
The corner sander was much easier to use, although again it was hard to control and I had to really concentrate to keep hold of it. It was far easier to change the sand paper too - just a circular piece held in with a bolt. It went right up to the edges and worked brilliantly. The only downside is that I went through about 15 of the circular papers as they wore out quickly on the black stained areas.
Sanded Like A Pro. Not.
So I'm not going to lie, it took BLOODY AGES. It was seriously hard work. I must have gone over some areas at least fifty times with no joy whatsoever. The unevenness of the boards didn't help - the sander couldn't flow smoothly over them and this often caused the belt to snap. I found that when I went across diagonally it got some of the worst off, but that caused the sander to explode every time without fail, which meant more sand paper changing (and more money spent) so I soon gave up on that method. After sanding for about seven hours, I realised that I wasn't going to get it much better than it now was. The black sections were still patchy but even going over them for ages with the corner sander didn't budge the stains. However, the boards had gone from having a defined middle square and surround to being consistently the same so I was quite happy that they would look okay once I had varnished them. I dug the rubbish out of the corners with a screw driver as best I could and called it a day.

The best that I could do. Seven hours work FFS.

Much improved but still patchy.
The corners complete with inappropriate footwear.
At this point, can I say that I wish that I had changed my shoes prior to commencement. I was still wearing the Havaianas and my feet are now covered in tiny cuts from a huge spray of sparks coming off the sander when it hit the original flat nails in the boards. Now I know how Jennifer Beals felt in Flashdance.
Finished The Job
The next day I hoovered up all the dust and zoomed to B&Q to find an appropriate wood stain. I took a photograph of the walnut wood in the other downstairs rooms and showed it to the assistant who quickly matched it up for me with Ronseal Walnut Diamond Hard Floor Varnish. It wasn't cheap - £49 for a tin - but I was advised that it was the most reliable product to use. I bought a shed varnish brush for £4 to apply it with. Dark wood isn't everyone's cup of tea, but our house is Georgian and the floors definitely suit a darker hue. The varnish was easy and super quick to apply. The first coat transformed the space and made the dark stained areas that had been hard to sand, blend in. After two hours I did a second coat - so quick, it literally took 15 minutes - and left it overnight.

Staining the floor with Ronseal walnut varnish.

Second coat done. Patchy, but the rug will cover the dodgy bits.
Much better than a wee stained carpet.
So the job is done. It wasn't easy. In fact, I would go as far as to say that it was, at times, a job of hell. But I am SO pleased with it. It's not perfect (not many of my DIY jobs are, tbh). It still looks patchy in places where the dark stains were, but let's face it, they've been there over 200 years so they were always going to be hard to shift. I like to think that these inconsistencies show character and give credence to the age of the house. Plus I'm going to put a huge Persian rug over it so it doesn't really matter.
I'm not going to win any prizes for floor sanding but I'm still pleased I gave it a go and will ALWAYS advocate trying to do it yourself. Even though I now feel like I've been six rounds with Floyd Mayweather and I've got sciatica in my left leg. It's much more satisfying (and significantly cheaper) than getting someone in to do it for you and the fact that you have had a hand in transforming something of such an age gives you a very good feeling inside. Let's hear it for girl power. DIY rules.